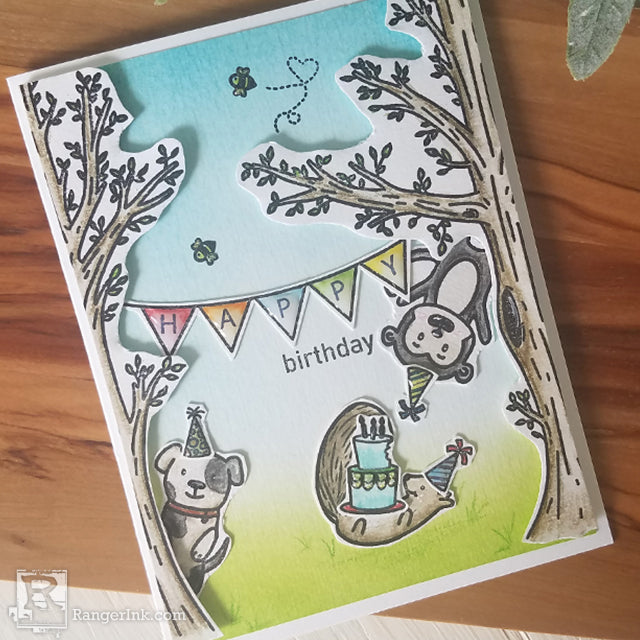
Create this playful Birthday Card using Simon Hurley create. Photopolymer Clear Stamps. Follow along as Joy Baldwin guides you through a step-by-step tutorial using Dina Wakley Media Scribble Sticks, Archival Ink and more!

Happy Birthday Friends Card by Joy Baldwin
- Materials
- Instructions
- Simon Hurley create. Dye Ink: Remember Me, Overzealous
- Simon Hurley create. Stamp Sets: Trampoline Friends, Bestest Friends
- Simon Hurley create. Stark White Cardstock
- Ranger Watercolor Paper
- Ranger Mini Ink Blending Tool with Foam
- Letter It™ Acrylic Stamping Block
- Ranger Archival Ink: Jet Black
- Ranger Non Stick Craft Sheet
- Ranger Multi Medium Matte
- Ranger Glossy Accents
- Ranger Adhesive Foam Roll: White
- Ranger Stickles Glitter Glue: Diamond
- Ranger White Opaque Pen
- Dina Wakley Media Scribble Sticks
- Tim Holtz Fine Detailer Waterbrush
Instructions

Step 1: Lay down the Non-Stick Craft Sheet. Trim a piece of Watercolor Paper to 4x5-1/4 inches. Blend Overzealous Ink for the grass and Remember Me Ink for the sky. Meet the Overzealous Ink to the Remember me Ink.

Step 2: Stamp Images from both Trampoline Friends and Bestest Friends Stamp Sets onto Watercolor Paper using Archival Ink in Jet Black. This is great for watercoloring.

Step 3: Use Dina Wakley's Scribble Sticks to add color to the images. Use the Waterbrush Pen to blend the color. Add more color as needed for shadows.

Step 4: Using Scissors, trim out the images leaving a white border.

Step 5: Cut the Tree image in half using a paper trimmer. The two halves will be on either side of the card, giving the appearance there is two trees.

Step 6: Using Multi Medium Matte Glue, adhere the Dog and Monkey to the sides of the card (they will be peeking out from behind the trees). Trim off any excess from the sides of the card.

Step 7: Use the ½ inch Foam Adhesive behind the trees and adhere them to the sides of the card. Line them up to the sides and bottom of the card. Trim the excess from the top of the card.

Step 8: Using Archival Jet Black Ink, stamp the Bee images from Bested Friends Stamp Set (put stamp images on the Acrylic Block). Then add some tufts of grass with the Green Scribble Stick.

Step 9: For the Sentiment, mask off the word “Happy” from the Happy Birthday Sentiment, you will only be using the word “Birthday.” Ink it with Archival Jet Black Ink. Remove the tape and stamp the sentiment below the “Happy Banner.”

Step10: Adhere the rest of the colored images to the background using Multi Medium Matte Glue. Position the banner behind the tree's, glue the cake to the squirrel, glue the squirrel to the grass and finally glue all the hats to the critters. Color the bees with the Lemon Scribble Stick.

Step11: To add extra embellishments to the card, use Glossy Accents, White Opaque Pen and Diamond Stickles. Use Glossy Accents for the noses of the critters, birthday hats and for the “Happy Banner.” Use the White Opaque Pen for freckles on the cheeks of the critters and finally finish with Diamond Stickles on the bee's and the cake. Adhere the panel to an A2 size, side-folding card base using Stark White Cardstock.


