


by Tim Holtz
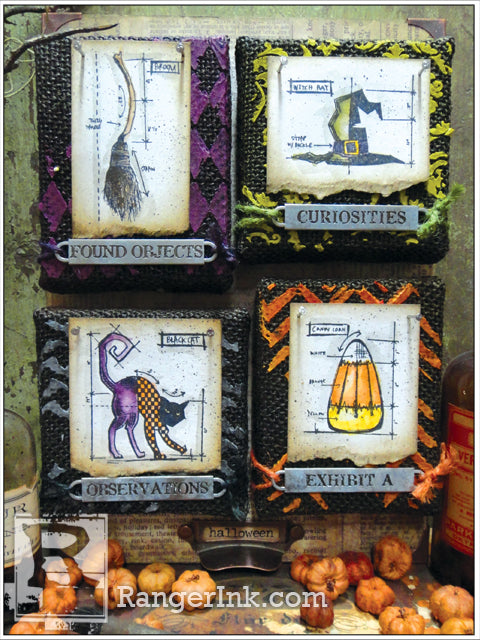
Halloween Burlap Panels by Tim Holtz
- Materials
- Instructions
- Tim Holtz® Mini Distress Ink Pads: Spiced Marmalade, Seedless Preserves, Crushed Olive, Black Soot
- Tim Holtz Distress® Watercolor Cardstock
- Tim Holtz® Distress Markers: Spiced Marmalade, Mustard Seed ,Crushed Olive, Peeled Paint, Seedless Preserves, Vintage Photo, Walnut Stain, Pumice Stone, Black Soot
- Tim Holtz Distress® Marker Spritzer
- Tim Holtz® Distress Spray Stain Black Soot
- Tim Holtz® Detailer Waterbrush
- Archival Ink™ Jet Black
- Ranger Mini Blending Tool
- Ranger Multi-Medium Matte
- Ranger Texture Paste
- Dina Wakley Media Palette Knife
- Ranger Non-Stick Craft Sheet™
- Idea-ology Mini Burlap Panels, Word Bands, Observations, Sanding Grip, Jute String, Label Pull, Mini Corners, Paper Stash, Lost & Found
- Stampers Anonymous Layering Stencils: THS016, THS026, THS046, THS047, Stamps: Mini Blueprints THMB019, Grid-Blocks
- Tonic Scissors
- Paint Brush, Wood Panel, Mini Nails, Hammer
Instructions


Step 1: Spray Mini Burlap Panels with Black Soot Distress Spray Stain – let dry.

Step 2: Place Layering Stencil over burlap and apply Texture Paste in random areas using Palette Knife.

Step 3: Repeat for all panels using various patterns – let dry.

Step 4: Ink Texture Paste with various colors of Distress Ink using Mini Ink Blending Tool.

Step 5: Stamp Mini Blueprint Images on to Distress Watercolor Cardstock using Archival Ink.
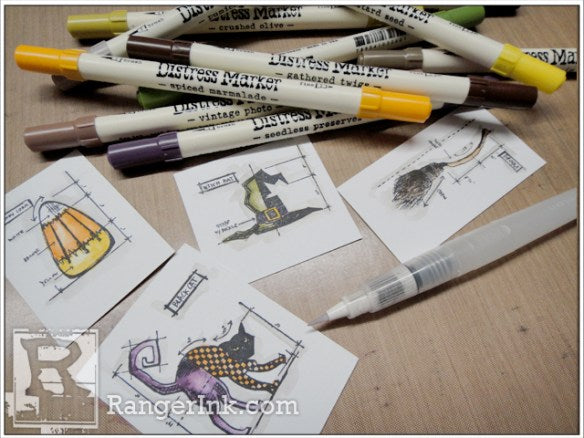
Step 6: Color images with various colors of Distress Markers and blend using a Distress Detailer Waterbrush – let dry.

Step 7: Tear off bottom edge of cardstock and ink with Distress Ink using Mini Ink Blending Tool.

Step 8: Lightly spritz over images with Black Soot Distress Marker using Distress Marker Spritzer.

Step 9: Adhere images to burlap using Multi-Medium – let dry.

Step 10: Attach two nails through top of images for effect.
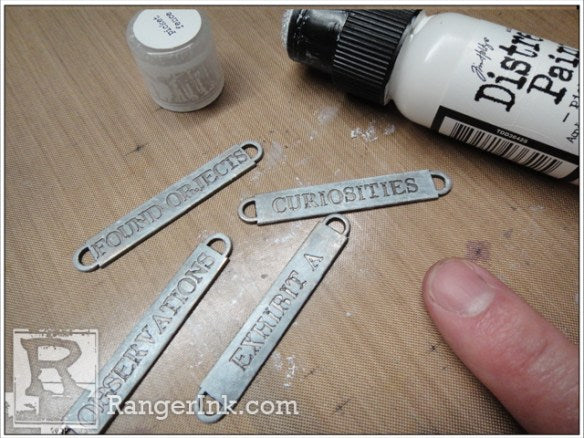
Step 11: Paint Word Bands with your finger and rub away excess for a worn effect.

Step 12: Cut various colors of Jute String.

Step 13: Tie Word Band on burlap with Jute String and trim excess.

Step 14: Cover Wood Panel with decorative paper using Multi-Medium, let dry.

Step 15: Ink edges with covered panel with Distress Ink using Mini Ink Blending Tool.

Step 16: Adhere burlap panels to wood panel using Multi-Medium. Embellish wood panel with Label Pull and Mini Corners.
Related Posts
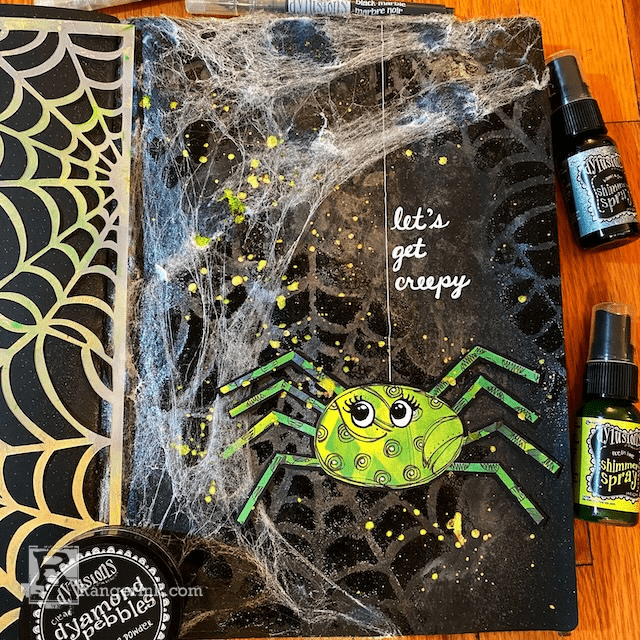
Dylusions Dyamond Let's Get Creepy Journal Page by Jess Peters
Get into the spooky spirit with this creepy-cute spiderweb journal page by Jess Peters! In this tutorial,...
Read More