By Zoe Hillman

Gilded Holiday Trio By Zoe Hillman
- Materials
- Instructions
- Ranger Brayers
- Tim Holtz Distress® Replacement Flip Tops
- Tim Holtz Distress® Splatter Brush
- Ranger Palette Knife Set
- Ranger Mini Blending Tool
- Ranger Non-Stick Craft Sheet™
- Ranger Heat it™ Craft Tool
- Tim Holtz Distress® Sprayer
- Ranger Shiny Foil Transfer Sheets: Vintage
- Archival Ink™ Designer Series: Wendy Vecchi: Tree Branch
- Ranger Watercolor Paper
- Embossing Powders: Liquid Platinum
- Tim Holtz Distress® Clear Embossing Ink
- Tim Holtz Distress® Stickles™ Dry Glitter
- Ranger Glossy Accents™
- Ranger Texture Paste
- Tim Holtz® Distress Spray Stains: Antique Linen, Frayed Burlap, Pumice Stone, Broken China, Picket Fence, Vintage Photo
- Tim Holtz by Stampers Anonymous: #028 - holiday knit stencil, #CMS063 - letter to santa stamp set, grid blocks
- Tim Holtz Alterations by Sizzix: #660052 - stacked snowflakes bigz die
- Tim Holtz idea-ology: Burlap Panel, Found Relatives Occasions Cards, Gilded Holidays Remnant Rubs, Frozen Alpha Parts, Adornments Ice Skates, Adornments Snowflakes, Box Corners, Loop Pins, Jump Rings, Swivel Clasps
Instructions

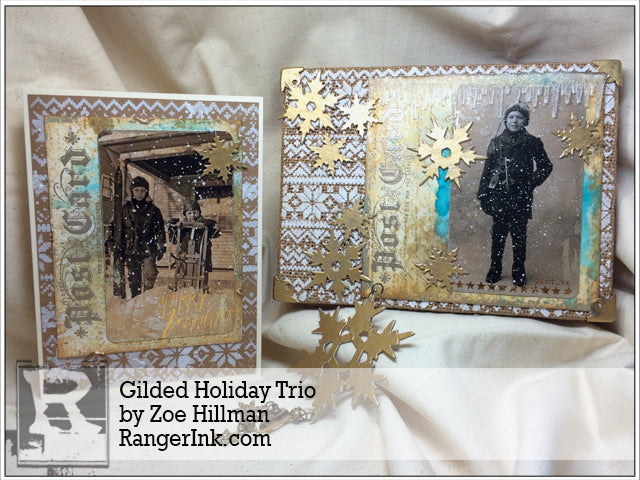
Hello everyone. I’m excited to be here at the Ranger Blog today with a tutorial for a holiday themed burlap panel, greetings card and tree decoration.
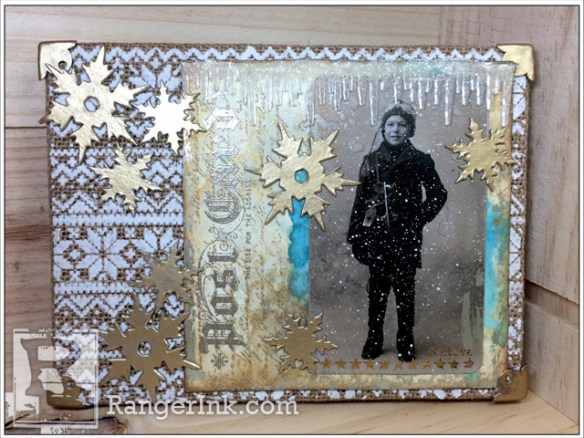
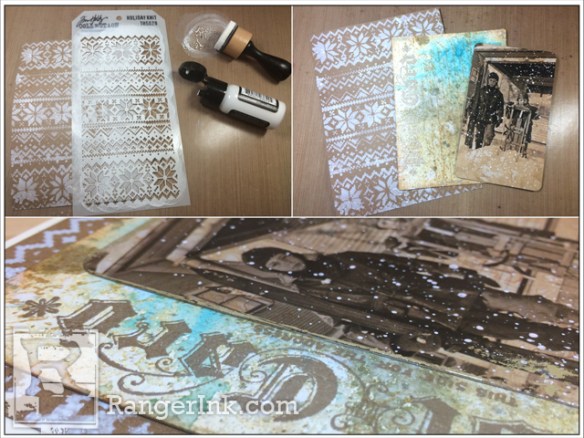
 Step 1: Take an idea-ology 4×6 inch burlap panel. Lay a stencil onto the burlap panel and spread Texture Paste through with a Palette Knife.
 Step 2: Set aside to air dry.
 Step 3: Cut a piece of Watercolor Cardstock 5.5 x 5.5 inches and spritz with water.
 Step 4: Spray with Antique Linen, Frayed Burlap, Pumice Stone and Broken China Distress Spray Stain and a final spritz of water. Dry with a Heat Tool.
 Step 5: Ink up a background stamp with Tree Branch Archival Ink and stamp without a grid block to give a less accurate stamped image. Stamp postcard with Distress Embossing Ink, cover with Liquid Platinum Embossing Powder, tap off excess and melt with a Heat Tool.
 Step 6: Foil the edges by swiping a Mini Collage Glue Stick over the edges of the cardstock, lay a foil sheet over the top, rub with your finger and peel back.
 Step 7: Adhere the Watercolor Cardstock to the burlap panel with Glue N’ Seal.
 Step 8: Blend Vintage Photo Distress Ink onto a card from the idea-ology found relatives occasions pack. Spritz with water and dry with a Heat Tool. Using the Distress Splatter Brush, pick up Picket Fence Distress Paint and flick onto the card to create a snow effect and dry with a Heat Tool.
 Step 9: Using the same foil technique as before, swipe a Mini Collage Glue Stick down the edges of the card and foil with Ranger Foil Sheets. I added various gilded holiday remnant rubs by Tim Holtz.
 Step 10: Next, cut icicles from the frozen alpha parts and cover with Glossy Accents. Sprinkle Clear Rock Candy Distress Glitter over the top, tap off the excess and set aside to air dry.
 Step 11: Attach the icicles to the top of the Watercolor Cardstock with Glossy Accents. Drip a little Glossy Accents over the join between the icicles, sprinkle over more Distress Glitter and tap off excess. This will hide the join.
 Step 12: Stick Ranger Foil Tape Sheets to thick card and die cut, I used Tim Holtz stacked snowflakes die. Dab Gold Alcohol Ink over the snowflakes with a Blending Tool.
 Step 13: Adhere the snowflakes to your burlap panel with Glossy Accents.
 Step 14: When adhering directly onto the burlap panel, apply pressure to the snowflake a little longer to get a proper bond.
 Step 15: Use the Gold Alcohol Ink to colour idea-ology box corners and adhere to the corners of the burlap panel with Glossy Accents.
 Step 16: Your burlap panel is complete.
 Step 17: To create a festive card, follow the same techniques as the burlap panel. However, to keep the card lighter, I used the holiday knit stencil and Picket Fence Distress Paint onto Kraft Cardstock to create the background.
 Step 18: Add some more gilded holiday remnant rubs and a small snowflake to embellish your card.
 Step 19: Gather together some festive charms, I used idea-ology adornments skates and snowflakes, covered with Gold Alcohol Ink.
 Step 20: Pierce holes in the top and bottom of the largest snowflake and hang charms from the bottom and attach fastener to the top to create a festive decoration.
Thanks for joining me. I hope you have enjoyed this tutorial and will take time over the holidays to get creative. Happy Holidays.


