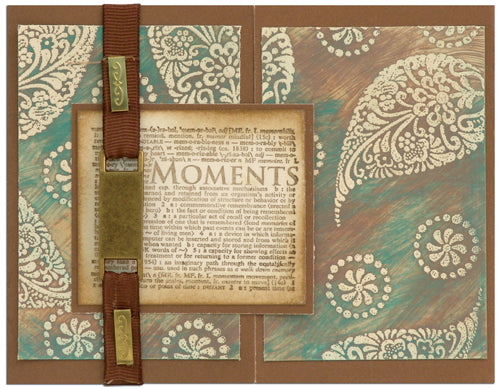
Use Ranger Embossing Powders to create exciting backgrounds for card making and scrapbooking projects!

Embossing Powder Resist Backgrounds By Cindy Rescorl
- Materials
- Instructions
Instructions
(1) Use Emboss It Ink to randomly stamp all over white cardstock to create a background design. Cover with Seafoam White Embossing Powder. Remove excess powder and return to jar. Heat emboss with Heat It Craft Tool until melted.
(2) Randomly cover cooled, embossed sheet with Adirondack Acrylic Paint Dabbers.
(3) Using a paper towel slightly dampened with water, wipe off embossed areas. See the white stamp images revealed since the embossing powder resists the acrylic paint.
(4) Use the Ink Blending Tool and Distress Ink to cover the entire surface of the background image. Wipe away excess ink with the dampened paper towel.
(5) Cut cardstock into two equal pieces and set aside.
(6) On a piece of brown cardstock, cut to 11″ x 4¼”. Fold each side inward to create a card that opens from the center. Glue each of the background pieces on top of each side. Set aside.
(7) On small piece of cardstock, stamp “moments” in Brushed Corduroy Distress Ink. Let dry. Trim around image so there is only a ¼” border on all four edges.
(8) Beginning on the Non-Stick Craft Sheet, use the Ink Blending Too in a circular motion, cover edges of stamped image with Distress Ink to age the cardstock.
(9) Cut a small piece of brown cardstock to frame the image. Glue image onto brown cardstock.
(10) Glue framed image onto the left side of card so that it extends across the opening of the card by ½”.
(11) Wrap ribbon buckle around card front.


