I really love the look of texture in all of my art. Whether it be added stitching, fabric scraps or layers of paint – I think texture gives an added element that really sets pieces apart from a one dimensional look. I like holding a piece in my hand and feeling all the different built up layers.
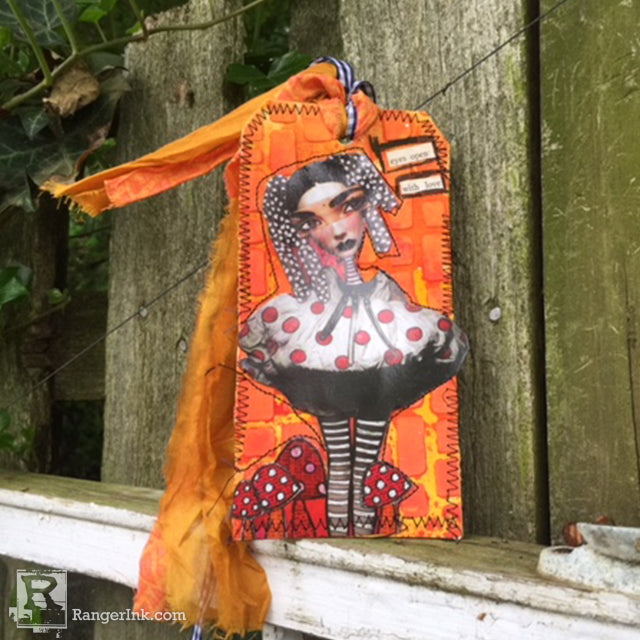
Dylusions Textured Tag by Kristi Nazzaro
- Materials
- Instructions
- Dylusions Ink Sprays: Postbox Red, Pure Sunshine, Lemon Zest
- Dylusions Shimmer Sprays: Pure Sunshine, Fresh Lime, Calypso Teal
- Dylusions Postcards
- Dylusions Stencils: Small Sugar Lumps
- Dylusions Creative Dyary Glue Sticks
- Tim Holtz Distress® Tags: #8 Mixed Media
- Ranger Mini Blending Tool with Foam
- Ranger Texture Paste
- Ranger Mini Misters
- Ranger Non-Stick Craft Sheet™
- Ranger Heat it™ Craft Tool
- Tim Holtz by Tonic Studios: Cush Grip Snips
- Palette Knife
- Pencil
- Brother Sewing Machine Model JX2517
- Thread
- Fabric
- Ribbon Scraps
Instructions
The Dylusions line by Ranger is so versatile. You really can go in so many directions when creating. For this tag I knew I wanted more than just stitching as added texture.
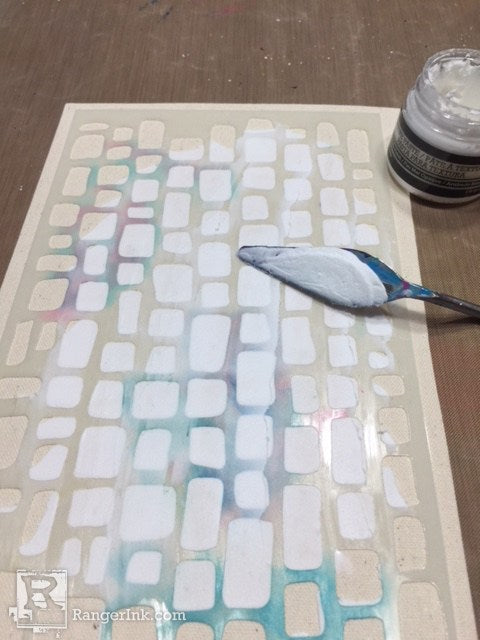
Step 1: Cut one sheet of Sticky Back Canvas in half. Using a pallet knife, add Texture Paste through the Dylusions Sugar Lumps Stencil.

Step 2: I used a Heat it Tool to speed the drying process up. Be careful not to overheat the Texture Paste.
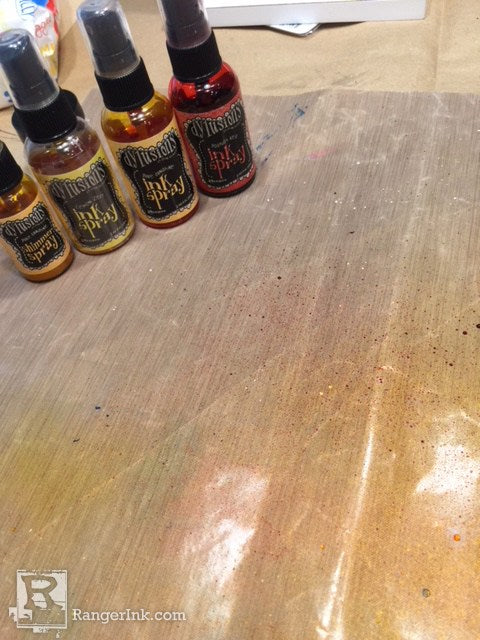
Step 3: Spritz the Craft Sheet with Dylusions Spray Ink in Postbox Red, Pure Sunshine and Lemon Zest. I also added the Dylusions Shimmer Spray in Pure Sunshine. Use a Mini Mister to lightly spray the ink with water.

Step 4: Place the texture pasted sticky-back canvas over into the ink and spread it around. I tried to make sure I was covering the canvas completely. Pick up the canvas sheet and moved it around to make sure the colors were blending.

Step 5: Use the Blending Tool to fill in any spaces not covered by ink.

Step 6: I partially peeled the backing off and firmly stuck a tag to the canvas.

Step 7: Return the backing and trace around the tag with a pencil to make cutting the tag out easier. Then cut out the tag.

Step 8: I chose one of the Dylusions postcards and fussy cut the image I planned to use.

Step 9: I then cut a few word phrases from an old book I use in my collage art. I glued both the image and the words down with a Dylusions Collage glue stick.

Step 10: Using my sewing machine, I added stitching around the image as well as the border of the tag. I never worry about straight lines. Wonky stitching adds character to your pieces and perfection is simply overrated. Let the machine do the work and enjoy the process.

Step 11: I had a few pieces of scrap material and ribbon and I used that as my tie up top. I hope you enjoyed this tutorial and I look forward to seeing what you make with your Dylusions and Ranger products!


