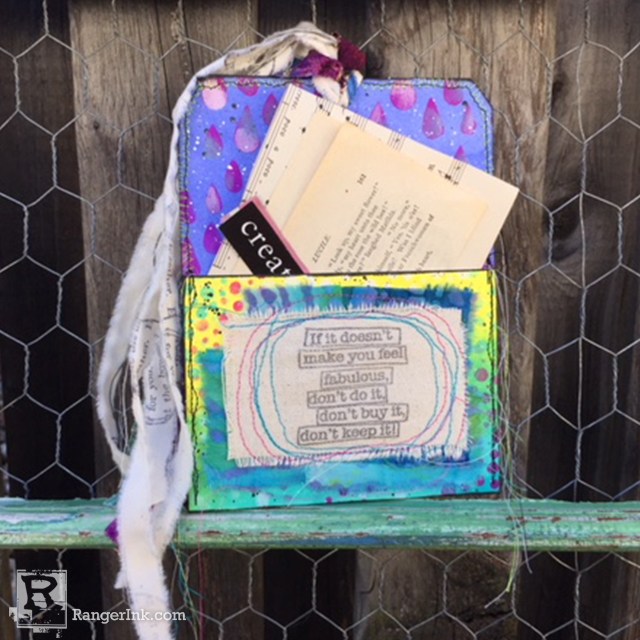
No secret here – I am addicted to art tags of all sizes, shapes and colors. They are so versatile and I find myself tucking them in my art journal quite often. Today I am showing you how I made this Pocket Tag with the Dylusions line from Ranger.
Dylusions Pocket Tag by Kristi Nazzaro
- Materials
- Instructions
- Dylusions Journaling Tags
- Dylusions Paint: Periwinkle Blue, Calypso Teal, Bubblegum Pink, Lemon Zest, Black Marble, White Linen
- Dina Wakley Media Acrylic Paints: Turquoise
- Dylusions Stamps: Starstruck, Quotes
- Dylusions Stencils: Small Raindrops, Small Bubbles
- Ranger Mini Blending Tool with Foam
- Archival Ink™ #0 Pads: Jet Black
- Tim Holtz by Tonic Kushgrip Snips
- Brother Sewing Machine Model JX2517
- Makeup Sponge
- Scrap Fabric
- Ribbon
- Canvas Pieces
Instructions

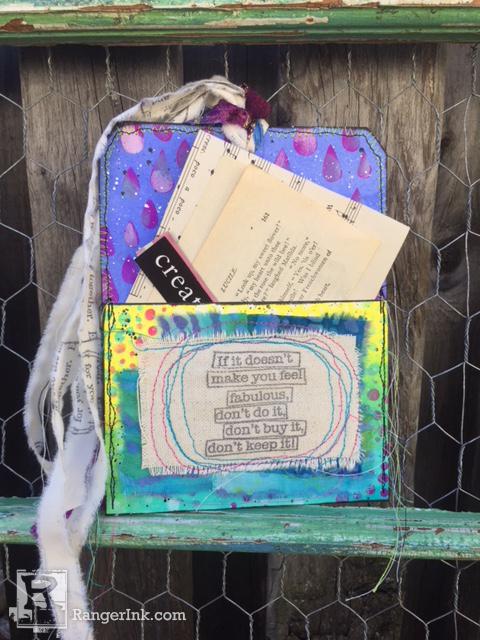
Step 1: Using the Mini Ink Blending tool I applied paint on both the front and back of a large Journaling Tag. Colors used: Periwinkle Blue, Calypso Teal and Lemon Zest. Because I wanted the front of the pocket to be a different color than the top of the tag I kept the color scheme the same on both sides. Allow the paint to dry completely.

Step 2: I folded the bottom of the tag up about half way. I am not one to measure so I eyeballed about how large I wanted my pocket to be.

Step 3: I stenciled both the front and back of the tag using a piece of a makeup sponge. I used the small bubbles stencil from the Quotes and Bubbles set for the entire tag avoiding the area right above the pocket. For that area I used the small Raindrops stencil.

Step 4: I applied Black Marble paint around the edges of both sides of the tag with my blending tool.

Step 5: Using a small paint brush, I splatter painted the front and back of the tag with White Linen Paint. Set the tag aside to dry.

Step 6: I always have scrap pieces of fabric and canvas in my stash. As the tag was drying I stamped my sentiment from the Quotes and Bubbles set on to a piece of scrap canvas with Jet Black Archival Ink.

Step 7: I used the Dylusions Starstruck Stamp Set to stamp small word bubbles onto a piece of cream colored scrap fabric.

Step 8: After the ink dried, I tore the fabric into strips.

Step 9: I found a few small pieces of batik fabric in my stash. I tore them so the edges were frayed and laid my stamped piece of canvas on top. Using my sewing machine I stitched the canvas and fabric scraps onto the front of the pocket of my tag. I am not able to completely sew a straight line which has its advantage in mixed media. I embrace the wonky look of sewing around in a circle over and over on the canvas and fabric pieces.

Step 10: Using different color threads I stitched the pocket together and went all around the edge of the entire tag. Again not worrying about the perfection of a straight line but more about making sure the pocket would hold.
Step 11: I used the torn pieces of stamped fabric as well as some ribbons from stash to make the tie up top.
Step 12: Last but not least I filled the pocket with a few collage pieces to be used for another project. I hope you enjoyed this tutorial and look forward to seeing what you make with your Dylusions products.