Give For Fun or Tag a Present

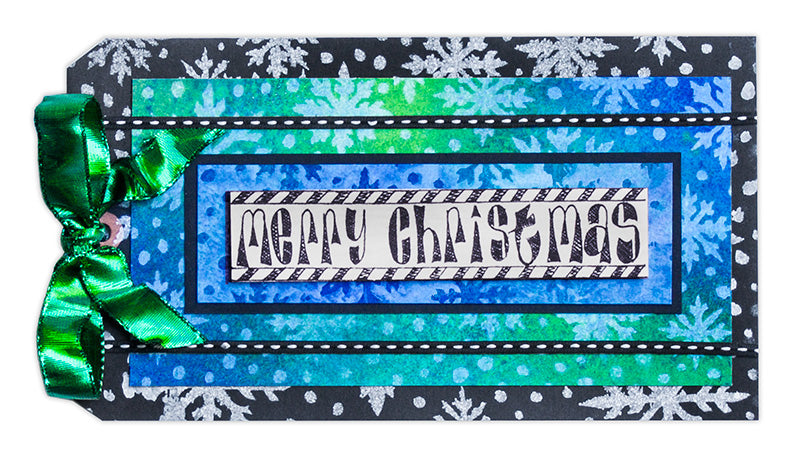
Dylusions Merry Christmas Tag by Debbie Tlach
- Materials
- Instructions
Instructions
1. Working on top of a Non-Stick Craft Sheet, place the Dylusions Let it Snow stencil on top of a Ranger #10 black tag. Shake the bottle of Dylusions Ink Spray in White Linen well. Holding the bottle about 12 inches from the table, spray through the stencil using light even passes across the stencil-covered tag. Gently remove the stencil. Let dry or dry with Heat-it Craft Tool. Tip: Turn the stencil over and press it against another tag for a reversed impression background tag to use at another time.
2. Place two sheets of Ranger Manila Cardstock on top of a Non-Stick Craft Sheet. Spray randomly with Ink Sprays in London Blue and Cut Grass. Let dry or dry with Heat It Craft Tool.
3. Place clean stencil over one piece of the Ink sprayed Manila Cardstock. Shake the bottle of Dylusions Ink Spray in White Linen and spray as before. Remove stencil carefully and place it face down on the other piece of Ink sprayed Manila Cardstock. Place a scrap piece of paper over the stencil and press down gently. Remove scrap paper and stencil. Let dry or dry with the Craft Tool.
4. Place the Merry Christmas Stamp onto the appropriate size grid block. Using the Archival Pad in Jet Black, stamp the image out onto Manila cardstock. Trim to size.
5. Cut, layer and mount using both stenciled colored papers & black cardstock onto stenciled tag using ¼” Wonder Tape. Use PopIt Shapes to adhere Merry Christmas. (Refer to photo.)
6. Use 1/8” Wonder Tape to adhere ribbon around card.
7. Tie Ribbon through hole in tag, make a bow & give to a friend!


