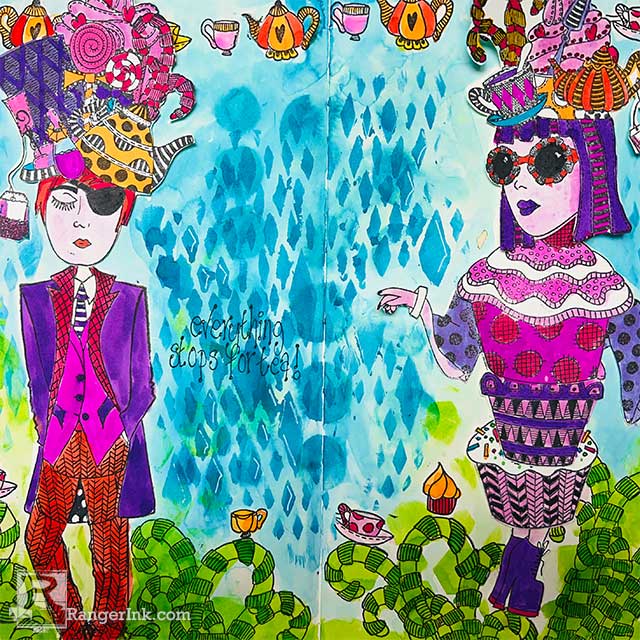
Follow along, as Milagros Rivera shows you how to use a variety of Dylusions Stamps, Stencils and Ink Sprays to make these colorful and quirky characters in your next Dylusions journal spread.

Dylusions Cupcake Lady Journal Spread by Milagros Rivera
- Materials
- Instructions
Dylusions Creative Journal Large
Dylusions Stencils of your choice
Dylusions Ink Sprays of your choice
Dylusions Stamps: Let Them Eat Cake, Eat Me, Drink Me, Tea Time Treats
Ranger Archival Ink™ Pad: Jet Black
Dylusions Small Journalling Block
Ranger Mini Ink Blending Tool with Foam
Instructions
I fell in love with the Alice in Wonderland vibe of Dyan’s new release. I immediately imagined a cupcake lady through and through, but I also wanted to use the second head on the stamp set, so I did both.

Step 1: Begin by stamping all the cupcakes to choose from them for your cupcake girl.

Step 2: Fussy cut them and now you’re ready to stack them to your liking. Don’t forget to stamp and cut a pair of shoes. From my Dylusions stamp collection I stamped and cut a pair of hands. Using the scale of your journal for height glue them together.

Step 3: To make my second page I wanted the pant fabric pattern to match my girl. Stamp and cut a mask for the suit and then use the cupcake wrapper to create a pattern. You then connect the lines to finish it.

Step 4: To begin your background, stamp the swirly elements in the Drink Me Stamp. I thought that gave me the perfect opportunity to hide teacups and such in the foliage. Mask the individual pieces for inking. Remove the tape and stamp in place.

Step 5: Repeat on the right hand page. I used the tea cup border on the top

Step 6: I stamped the eat me tag and fussy cut it to slide it in her hands. This is how it looks, glue in place.

Step 7: By now you may have realized there’s still no color on my background I kinda work backwards. I get enthralled in the design process of using my stamps and how I want to color them that this happens to me all the time! Soooo, this is how I roll. I put ink on my Blending Tool and put the stencil over the background and begin laying the colors

Step 8: I like using a paintbrush to dip in the inks and paint my images. To me this is the most satisfying time after the design is thought. Choose whatever colors give you joy as this is a zen moment in my experience!

Step 9: Once I do my initial Blending Tool on the stencil I then dip my brush in water and begin moving the ink around the background. Dylusions ink oxidizes in water and gives such beautiful tones as it mixes with the colors. If you use the Shimmer Sprays there’s even more beauty to be had in your background.

Step 10: Continue laying different stencils and adding more color and textures. I wanted to give a black contrast to some of the images so I waited until the inks were dry to use my Fudeball pen and color.

These are the colors I used.

These are the stencils I used.

Now go and get a set of Dylusions inky hands and enjoy the process!


