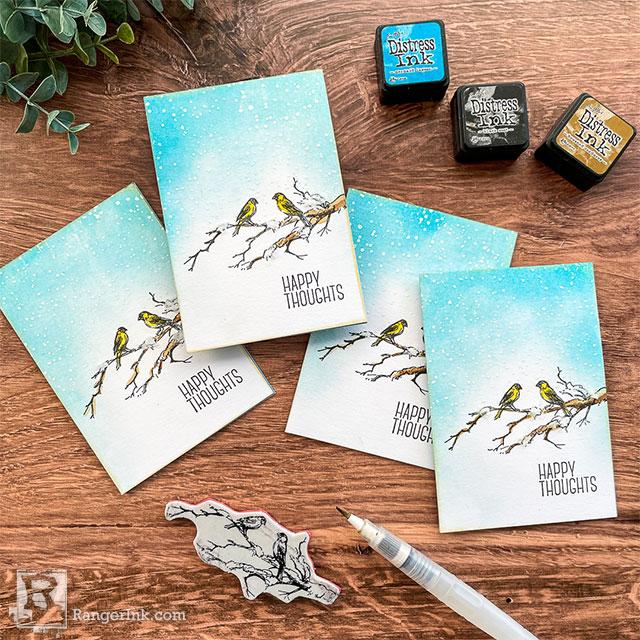
In this tutorial, Cheiron Brandon shows you how to emboss and watercolor with Distress Inks to create multiples of these fun and charming cards.

Distress® Winter Birds Card by Cheiron Brandon
- Materials
- Instructions
Tim Holtz Distress® Mini Archival ink™ Kit #3: Black Soot
Tim Holtz Distress® Mini Inks: Antique Linen, Speckled Egg, Mustard Seed, Carved Pumpkin, Gathered Twigs, Brushed Corduroy, Hickory Smoke
Tim Holtz® Holiday Distress Texture Set
Tim Holtz® Distress Palette Knife
Ranger Emboss It™ Ink Pad: Grey
Ranger Ink Blending Tool with Foam
Tim Holtz Distress® Detailer Waterbrush
Ranger Embossing Powder: White
Tim Holtz® By Stampers Anonymous Stamp Sets: CMS428 Winterscape; CMS366 Glorious Garden
Other
Splat Box
Hi there, creative friends! It’s Cheiron Brandon here with a fun winter card to make and send after the holiday cards have gone out and before we start thinking of Valentines. To me, the best kind of card is the one you get for no reason at all…just a friend saying they are thinking of you. I made a little stash of these to send to some crafty friends on my list. These would also be a great little gift set for a friend that loves birds.
Let’s keep the cards simple today. I used the sweet little birds and snow image from the Tim Holtz Cling Mount Stamp Winterscape stamp set along with a sentiment from the Glorious Garden stamp set. To add a little winter sparkle, I added a bit of Snowfall texture paste from the Tim Holtz Distress Holiday Texture set.

Step 1: Gather up your supplies: Winterscape stamps, Glorious Garden stamps, Black Soot Distress Archival Ink and Distress Watercolor Cardstock panels cut to 3 ½ x 5.

Step 2: Stamp the birds and sentiment onto the card panels using the Black Soot Distress Archival Ink. Dry with Heat Tool.
 Step 3: Create a mask by stamping the bird image onto a post it or masking paper. Cut out and apply it over bird image on panel. Just the top of the image is fine, since there is no stamping on the bottom of the card.

Step 4: Stamp the snow in Embossing Ink and heat emboss with White Embossing Powder.

Step 5: Remove the mask and blend the top of the cards with Speckled Egg Distress Ink using a Foam Blending Tool. I created a shadow around the edges.

Step 6: Color in the image with Distress Inks and a Detailer Water Brush. I used the Distress Ink Minis in Mustard Seed, Carved Pumpkin, Gathered Twigs, Brushed Corduroy and Pumice Stone pressing them into the glass mat, then picking up the color with the brush.

Step 7: Once the water coloring is dry, use the back of a palette knife to scoop out a bit of the Snowfall Texture Paste and add to the ‘snowy’ spots on the tree. Let dry. I let mine dry overnight.

Step 8: Ink the edges of the panels with Antique Linen Distress Ink to give them a vintage look. Adhere the panels to a 3 ½ X 5 notecard.
That’s it! Super simple and wintery…and a great way to send some happy thoughts anytime, especially on those snowy days. Wishing you all a wonderful holiday season!
Your Cart
- Choosing a selection results in a full page refresh.


