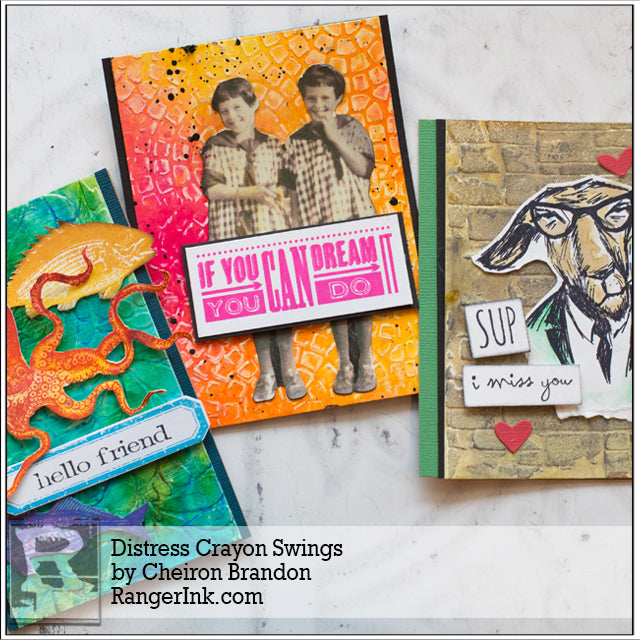
I love experimenting with my Distress Crayons and Ranger Mediums and often create many different panels at a time. One of my favorite uses for these backgrounds is incorporating them into my card making.

Distress Crayon Backgrounds by Cheiron Brandon
- Materials
- Instructions
- Tim Holtz® Distress Crayons
- Tim Holtz Distress® Mixed Media Heavystock
- Dina Wakley Media Gesso : White
- Ranger Texture Paste : Opaque Matte
- Dina Wakley Media Palette Knife
- Tim Holtz® Distress Collage Mediums : Crazing, Matte
- Tim Holtz Distress® Grit-Paste
- Tim Holtz® Distress Spray Stains : Picked Raspberry, Squeezed Lemonade, Carved Pumpkin
- Archival Ink™ #0 Pads : Jet Black, Vibrant Fuchsia
- Tim Holtz® Distress Splatter Brush
- Tim Holtz® Distress Paint : Black Soot
- Dina Wakley Media Brushes
- Ranger Adhesive Foam Rolls
- Tim Holtz by Stampers Anonymous Layering Stencils: Splash, Mosaic, Slate
- Tim Holtz Cling Stamps: Hipster Animals, Mini Motivation , Crazy Talk, Sea Life, Simple Sayings
- Tim Holtz Paper Dolls
- Tim Holtz Sizzix Heartfelt Die
Instructions
Today I will walk you through three of my favorite background techniques with Distress Crayons and Ranger Mediums including collage medium resist, Picket Fence Distress Crayon resist and Distress Grit paste on panels of Mixed Media Heavystock.

Step 1: Create the first panel by applying Opaque Matte Texture paste through the Splash stencil. Let air dry.

Step 2: Once the texture paste is dry, add a layer of the Distress Collage Crazing Medium and let dry. The medium will allow the next layer of Distress Crayons to glide over the texture.

Step 3: Apply Distress Crayons, one color at a time to small areas of the surface with your finger, blending each small area as you go.

Step 4: Continue building layers, until you achieve the desired effect.

Step 5: Trim background panel and apply to card. Add colored images from Sea Life and Simple Sayings Set.

Step 6: To create the Mosaic background, use Picket Fence Distress Crayon to color through the Mosaic stencil. I like to build up some texture here.

Step 7: Remove the stencil and let dry.

Step 8: Spray the panel with Distress stains in Picked Raspberry, Squeezed Lemonade and Carved Pumpkin. Let dry, then gently wipe over raised areas with a damp (but not too damp) baby wipe.

Step 9: Trim panel and add to card. Add Paper Dolls with Distress Collage Medium. Stamp sentiment from Mini Motivation in Vibrant Fuchsia, and adhere sentiment to card with Adhesive Foam.

Step 10: For the third card panel, apply Grit Paste through the Slate stencil and let dry.

Step 11: Once the grit paste is dry, color in the panel with Distress Crayons, again working in small areas and blending with your finger as you go. On this one, I like to start with
lightest color, and work the darker in as I go.

Step 12: Continue adding Distress Crayon, layering and blending until you achieve the desired effect.

Step 13: Once the layer is complete, trim and add to card panel. Stamp Hipster Goat, sentiment and cut out. Add cut out Sizzix Heartfelt hearts.

Thanks for following along today with my tutorial. I hope this inspires you to take some of your experiments with Distress Crayons and turn them into happy mail that you can send to family and friends!
Your Cart
- Choosing a selection results in a full page refresh.


