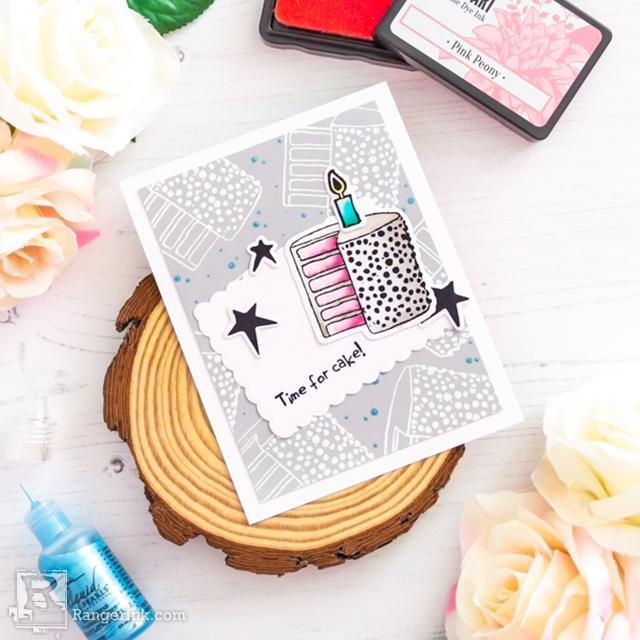
Creating handmade birthday cards can be simple and easy, and still have plenty of time for cake! Follow along with this tutorial by Laura Volpes where she shows you how you can use a individual clear stamps from Wendy Vecchi MAKE ART to design your own custom designed cake panel card front.

Custom Background Birthday Card by Laura Volpes
- Materials
- Instructions
Instructions

Step 1: Trim Wendy Vecchi Perfect Cardstock in the color Grey to 5x3.75". Create a custom background by heat embossing one of the images in the Wendy Vecchi Birthday Bash Stamp, Die & Stencil Set with Ranger White Embossing Powder. Rotate the image as you stamp, to create a random pattern.

Step 2: Embellish the background using Liquid Pearls in Cornflower Blue. Use the tools in the Wendy Vecchi Perfect Stylus Set to create perfectly rounded dots in different sizes. Set aside to dry.

Step 3: Stamp more images from the Birthday Bash stamp set on Tim Holtz Distress® Watercolor Cardstock. Use Archival Black Ink and watercolor the images using Wendy Vecchi Blendable Dye Inks. The colors used for this card are the following: Watering Can for the frosting, Thistle and Pink Peony for the cake sponge, Bluebird for the candle, Tiger Lily and Sunflower for the flame. Once the images are dry, use the coordinating dies to die cut them out.

Step 4: Die cut some more Distress Watercolor Cardstock with the scalloped rectange die in the Birthday Bash set. Stamp the sentiment on the lower left corner of the panel, using Archival Black Ink.

Step 5: Glue the scalloped rectangle to the custom background created in Steps 1 and 2. Make sure to adhere the white panel at an angle for added interest. Glue down the cake as well.

Step 6: Mount everything on a White Wendy Vecchi Perfect Cardstock Panel and finish off the card with stamped and die cut stars from the Wendy Vecchi Birthday Bash stamp set.
Your Cart
- Choosing a selection results in a full page refresh.


