


Make a cute, clean birthday card with these simple steps from Laura Volpes! Laura shows how easy it can be to create simplistic, yet simply adorable birthday cards using the Wendy Vecchi MAKE ART Stamp, Die & Stencil Birthday Bash set!
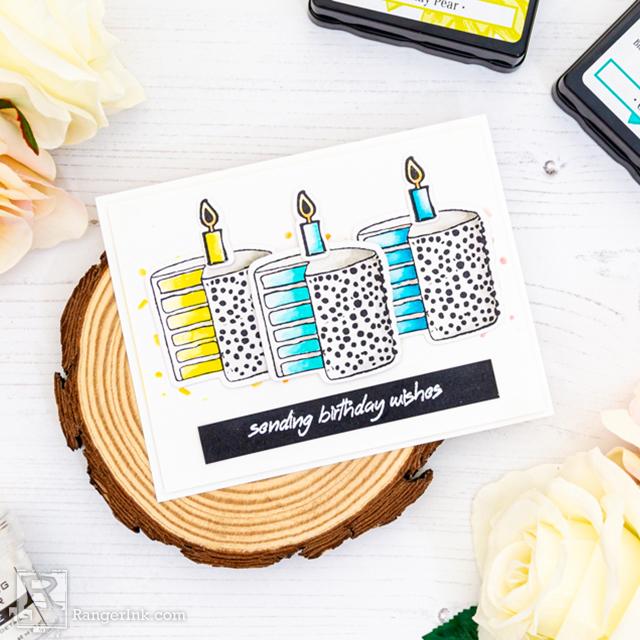
Clean and Simple Birthday Card by Laura Volpes
- Materials
- Instructions
Masking Paper
Instructions

Step 1: Trim some white cardstock to 4x5.25". Mask the bottom portion of the panel, using the L-shaped ruler in the Perfect Stamp Positioner set to adhere the masking paper straight.

Step 2: Position the stencil in the Birthday Bash Stamp, Die & Stencil Set on the panel, slightly overlapping it with the masking paper. Secure it with the magnets in the Wendy Vecchi MAKE ART Stay-tion and blend Wendy Vecchi Blendable Dye Inks through the stencil. Start with Sunflower on the left edge and then blend Tiger Lily in the center. Leave a white area on the right side of the panel.

Step 3: Clean the stencil, shift it towards the right side of the panel and finish off the background by blending Pink Peony ink through the confetti pattern.

Step 4: Lift the stencil and peel off the mask to reveal this fun and cheerful design!

Step 5: Stamp the cake and the candle in the Birthday Bash Stamp, Die & Stencil Set three times using Jet Black Archival Ink. Stamp on Distress Watercolor Cardstock and paint the images with Wendy Vecchi Blendable Dye Inks. Press the ink pad on a sleek surface to release some of the ink and use a wet paintbrush to paint the images.
Use Bluebird, Garden Patina and Prickly Pear on the cake layers to complement the colors of the stenciled background. Shade the frosting with Watering Can. Die cut the images with the coordinating dies.

Step 6: Stamp one of the greetings in the Wendy Vecchi Birthday Bash Stamp, Die & Stencil Set with Letter It™ Embossing ink on some black cardstock. Coat the sentiment with Ranger White Embossing Powder and melt the powder with the Ranger Heat It Craft Tool.Cut the cardstock into a thin banner.

Step 7: Adhere the stenciled panel on an A2 white card base. Use foam tape for some added dimension. Add the birthday cakes and candles to the center of the design, raising the cake and the candle in the middle with some more foam tape. Finish off the card by adhering the sentiment strip under the birthday cakes.
 I am an Italian crafter with a huge passion for card making and paper crafting. I currently live in England with my husband, who always supports and encourages me, and is the reason I started exploring my crafty side in the first place. I love crafts in general, but paper crafts really stole my heart! I like bright and cheerful cards, and I am always trying to experiment with new media and techniques.
I love sharing my creations on my blog, YouTube channel and social media, where you can find me as @abitofmycrafts. Come over and say hi!
Related Posts

Simon Hurley create. Solar Spray Card by Cassie Trask
Shine bright with this shimmering floral card by Cassie Trask! In this tutorial, she uses the latest Simon Hurley create. Heartfelt...
Read More
Your Cart
- Choosing a selection results in a full page refresh.
