by Tracy Scott
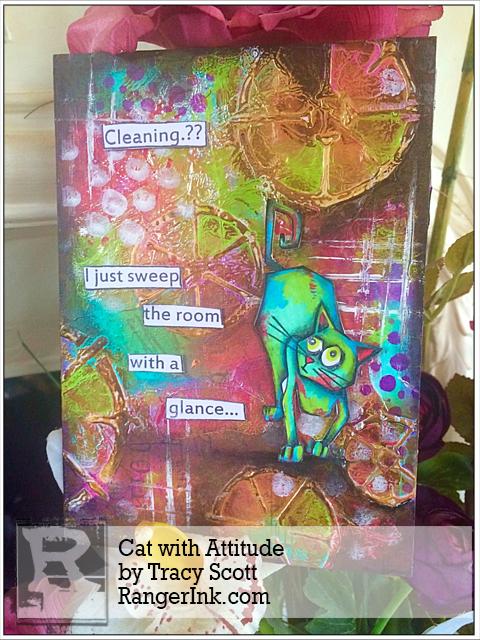
Cat with Attitude by Tracy Scott
- Materials
- Instructions
- Dina Wakley Media Heavy Body Acrylic Paint: Turquoise, White, Magenta, Lime, Blackberry Violet
- Dylusions Cling Mount Stamp: Quote
- Dina Wakley Media Stencils: Gears
- Dylusions Stencils: Bubble
- Archival Ink™ #0 Pad Jet Black
- Ranger Mini Blending Tool
- Dina Wakley Media Palette Knife
- Ranger Texture Paste
- Ranger Multi-Medium Matte
- Tim Holtz Tissue Wrap
- Tim Holtz by Stampers Anonymous – Cat Crazy Stamps
- Stabilo – Black Aquarellable Pencil
Instructions

 Step 1: For my project I chose a 5×7 acrylic board and started by taking a scrap of the Tim Holtz tissue paper, adhering with gel matte medium.
 Step 2: I had a scrap of tin foil that I had been picking up excess paint on from other projects and tore this into a couple of pieces to adhere to my board. I like that it has some of the silver foil showing through.
 Step 3: Using Dina’s Turquoise and Magenta acrylic paints, I rubbed these on randomly with my fingers (I love a bit of finger painting!!) filling in some of the white spaces and blended the collaged pieces into the background.
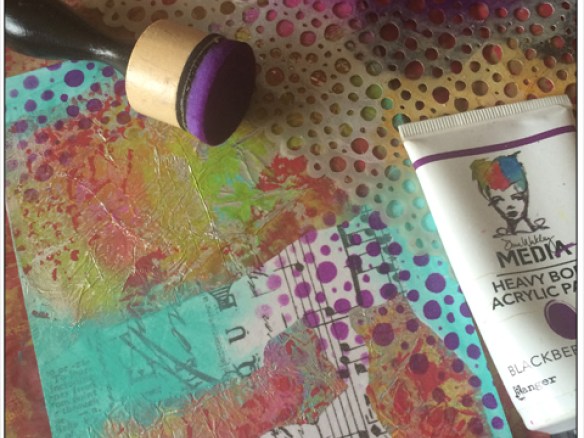 Step 4: For the next step I used Dina’s blackberry Violet Acrylic Paint and the fabulous small Dylusions Bubble Stencil using the Blending Tool to dab through the stencil.
 Step 5: Continuing with the Blackberry Violet and the blending sponge I rubbed the excess paint into the board filling in some more of the white spaces and blending colours together.
 Step 6: I then added some texture with the fabulous Dina Gears stencil (I think this is my favourite stencil of the moment!!) and some Ranger Texture Paste and allow to dry.
 Step 7: Using Dina’s Lime Acrylic Paint I painted in a couple of the triangle of the stencil and rubbed some in randomly to the background to tie the colours together.
 Step 8: Moving onto my distress paints now I randomly added some of the festive berries to the background again using my fingers to rub the colour in and blend.
 Step 9: I love the Ranger Gold Dabber and love the effect it gives when lightly rubbed over the top of Texture Paste. Here I rubbed it over the gears and added a small amount to the board, going over the same areas again with the Ground Espresso paint to grunge up the board a little, including the edges.
 Step 10: For my final touch I used some of Dina’s White Acrylic Paint and both dabbed it on with my finger to create dots and used the side of a palette knife to create thin white lines.
 Step 11: I stamped one of Tim’s cute crazy cats onto smooth white card and chose the following distress paint colours….Festive Berries, Twisted Citron, Evergreen Bough, Salty Ocean, Cracked Pistachio
 Step 12: Starting with the cracked Pistachio and a small paintbrush I covered the stamped image. I moved on to Evergreen Bough and used this around the edges of the image to create a shadow. I then used the Twisted Citron to add some highlights to the body.
 Step 13: Next, I added some of the Salty Ocean Paint around the edges of the image to add a darker shadow and to finish the painting a little of the Festive Berries (I added this randomly to create some interest). I then went around the whole of the image with a black pencil to add some extra dark shading to create some depth.
 Step 14: I cut out my image and attached to my board using foam tape so that it stood off the board slightly. I then went in with the black Stabilo Aquarellable watercolour pencil to give my cat something to stand on (I couldn’t have him floating in mid-air now could I!!)
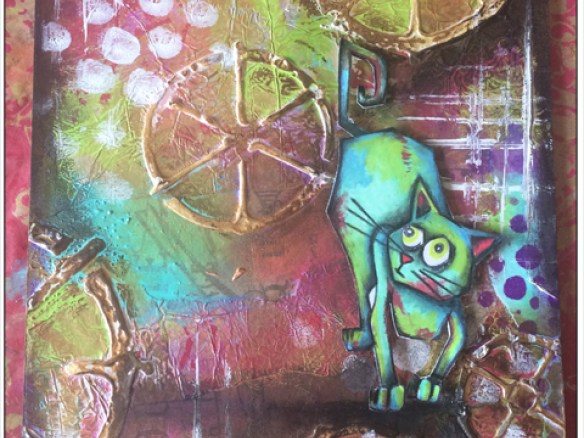 Step 15: I continued with the black Stabilo pencil and added some dark shading all around the edge of my board activating the pencil with water to blend.
 Step 16: I love Dyan’s quotes and always seem to be able to find one that is perfect for the project I am working on, I stamped onto smooth white card and cut out, each piece was then mounted onto the board with foam tape to give some extra dimension.


