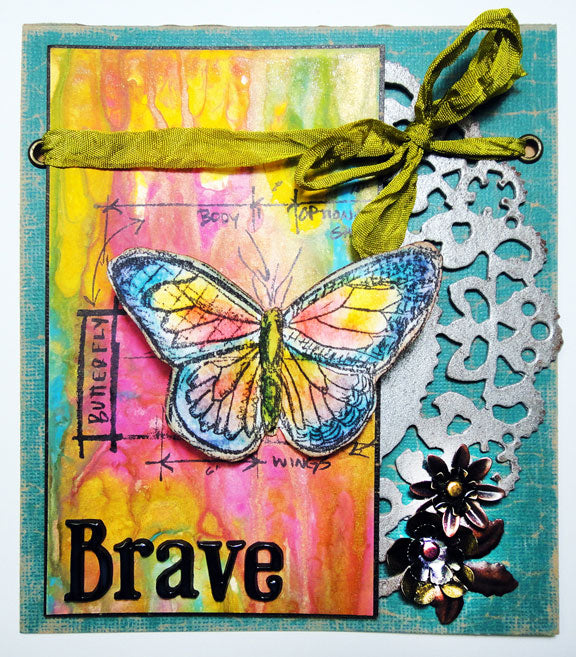
Learn to make this colorful blended background with Tim Holtz Distress Paints.

Brave Card by Tim Holtz
- Materials
- Instructions
- Tim Holtz Distress® Ink Pads
- Tim Holtz Distress® Stains
- Tim Holtz Distress® Markers
- Tim Holtz® Waterbrush
- Ranger Non-Stick Craft Sheet™
- Ranger Ink Blending Tool & Foam
- Ranger Glossy Accents™
- Ranger Mister
- Tim Holtz idea-ology-Foliage, Crinkle Ribbon, Alpha Parts, Grungeboard
- Sizzix Alterations by Tim Holtz-Doily On the Edge Die
- Core’dinations-Tim Holtz Kraft Core Shattered
- Watercolor Paper
- Eyelets
Instructions
1. Create a marbled metallic background by applying various colors of Distress Paint including one of the metallic colors to your Craft Sheet.
2. Mist the paints on the Craft Sheet with water using a Mister.
3. Swipe a #8 Manila Tag through the paints several times until surface is covered with color.
4. Mist again with water and dry tag completely with Heat Tool.
5. Stamp blueprint image on to background using Jet Black Archival Ink and let dry.
6. Cut off the top of the background tag and matte with black cardstock.
7. Stamp image twice on watercolor paper using Jet Black Archival Ink and let dry.
8. Color the butterfly image on one, and just the body on the other with Distress Markers. Blend colors using a Detailer Water Brush until desired look is achieved.
9. Dry watercolored images with Heat Tool.
10. Cut out butterfly image from one, and just the body from the other.
11. Ink the edges of cut pieces with Distress Ink using an Ink Blending Tool.
12. Adhere butterfly layers over stamped background using Glossy Accents.
13. Die cut Doily from Grungeboard, paint with Metallic Distress Paint and let dry.
14. Cut Shattered cardstock for the base card approximately 5 1/4” x 12” and fold in half at 6”.
15. Adhere Grungeboard Doily to card using Glossy Accents.
16. Adhere butterfly background over Doily using Glossy Accents.
17. Color a piece of Crinkle Ribbon using Distress Stain, mist with water to blend, crumple into a ball, and dry with Heat Tool.
18. Set a couple of eyelets through the front of the card and tie ribbon through.
19. Attach metal Foliage to card front using fasteners.
20. Adhere Alpha Parts to card and apply a layer of Glossy Accents over the top of each letter for an enameled effect and let dry completely.
 |
 |


