by Audrey Pettit
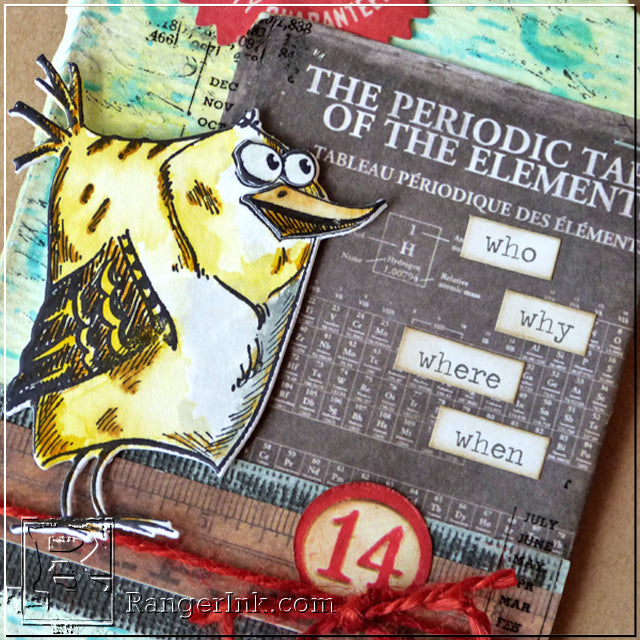
Bird Crazy Back to School Pencil Pack by Audrey Pettit
- Materials
- Instructions
- Tim Holtz Distress® Watercolor Cardstock
- Tim Holtz Distress Ink Pads: Black Soot, Frayed Burlap, Salty Ocean, Cracked Pistachio, Mustard Seed
- Archival Ink: Jet Black
- Tim Holtz Distress Markers: Wild Honey
- Ranger Glossy Accents™
- Tim Holtz® Waterbrush
- Ranger Wonder Tape™
- Ranger Mister
- Ranger Mini Blending Tool
- Ranger Non-Stick Craft Sheet™
- Ranger Heat it™ Craft Tool
- Tim Holtz Core'dinations Distress Cardstock
- Tim Holtz Sizzix Alterations: Postage Stamp Frame Die, Bird Crazy Thinlits
- Tim Holtz Stampers Anonymous Cling Stamps: Bird Crazy Stamps, Reflections Stamps
- Tim Holtz Stampers Anonymous Layering Stencils: Measured Layering Stencil
- Tim Holtz Idea-ology: Chit Chat Stickers, Numbers Remnant Rubs, Thrift Shop Ephemera Pack, Jute String, Tiny Attacher, Sanding Tool
Instructions
 Hi everyone! It is Audrey here today with a back to school project idea featuring some fun inky Distress techniques mixed with stenciling, stamping, and die cutting.
 I have made a mini folder using the adorable Bird Crazy stamps and dies by Tim Holtz that is perfect for holding any number of back to school supplies such as pencils, pens, rulers, erasers, and post-it notes, just to name a few.
 I think these crazy birds are just so fun, but of course you can change out the image to create any look and style you choose. And if you don’t have a student heading back to school this fall, remember these techniques can be used for card making, art journaling, scrapbooking and more. Let’s take a closer look.
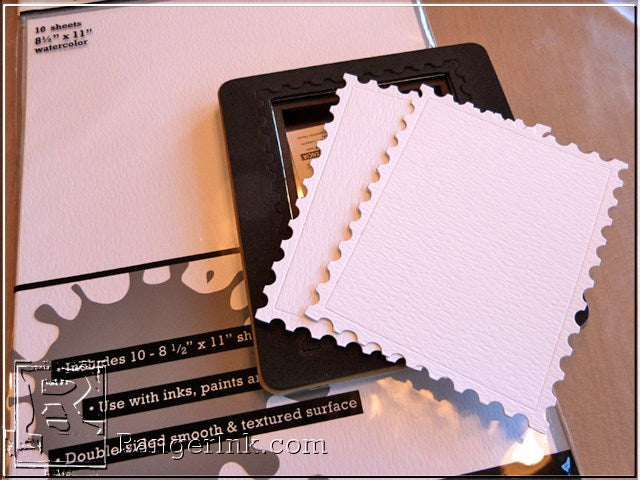 Begin by die cutting two Postage Stamp Frames from watercolor paper. You could also easily substitute another larger shape die, or even use simple rectangles, for this step.
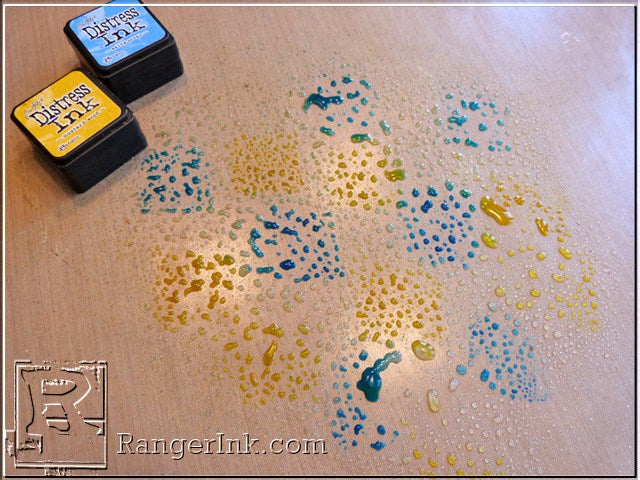 Working on a non-stick craft sheet, dab Mustard Seed and Salty Ocean Distress inks randomly onto the sheet, and mist the inks liberally with water until large water beads form in the ink.
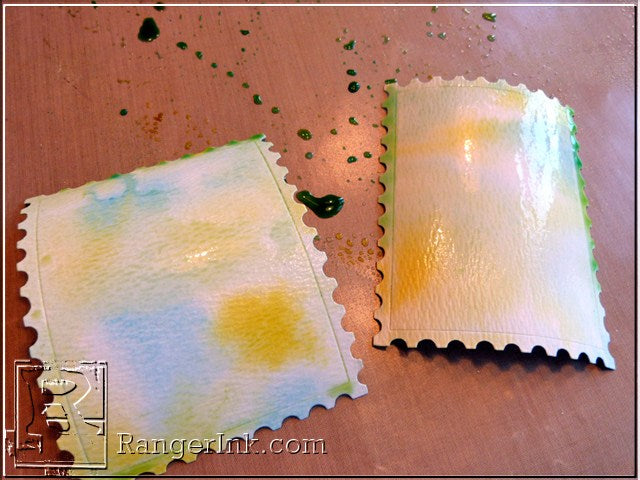 Press one of the frame die cuts into the ink mixture and give the paper a little back and forth twist to spread the inks around on the paper. Repeat the process with the second die cut frame. Allow the inks to dry, or dry them with the heat it tool. You can press the paper back down into the ink mixture if you want to intensify any of the color. Dry the paper again, and then repeat the same process for the back side of both frames.
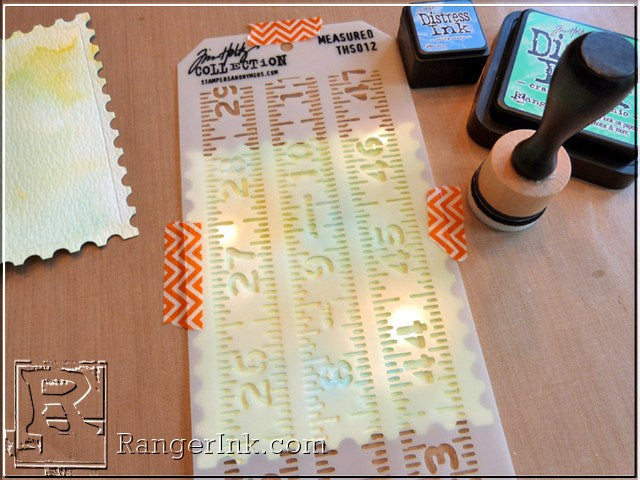 Lay the Tim Holtz Measured Layering Stencil onto the front of one of the frames, and hold in place with a bit of washi or tissue tape. And then using a Mini Ink Blending Tool, apply Salty Ocean Distress Ink to a few areas of the frame through the stencil. Switch to Cracked Pistachio Distress Ink for the remaining areas.
 Carefully peel up the stencil and check out the fabulous background you have made!
 Using a scoring board or bone folder, score down the left edge of both of the frame pieces, about a half an inch in from the left side. This may need to vary depending upon the items you wish you place on the inside of the folder.
 Crease along the score lines to create the “spine” for the folder.
 Before we assemble the folder, it’s time to add any additional embellishments. I added some random text and script print stamping to both covers using Black Soot Distress ink.
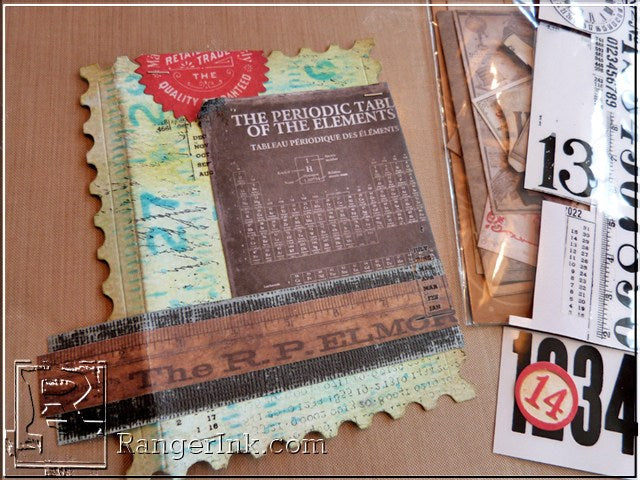 To dress up my cover, I added a variety of die cut ephemera and black remnant rubs, along with a strip of sanded Distress cardstock. A few Tiny Attacher staples add to the schoolhouse look. And before I adhere everything in place, I like to add brown Distress Ink to the edges of all my paper and ephemera pieces using the Mini Ink Blending Tool.
 Now add your school supplies to the inside back cover of the folder using strips of double-sided adhesive. I hid my adhesive with another piece of sanded cardstock, just to give a more polished finished look. Then to adhere the folder, add a line of Wondertape to the spine of one frame and press the two pieces together.
 Tie jute string around the bottom of the folder to keep it closed. Add chit chat stickers for a quick and easy sentiment. And now we’ll add a Bird Crazy bird to finish things off.
 Stamp a bird onto watercolor paper using Jet Black Archival Ink, and a stamp the same bird a second time with just the head portion of the image.
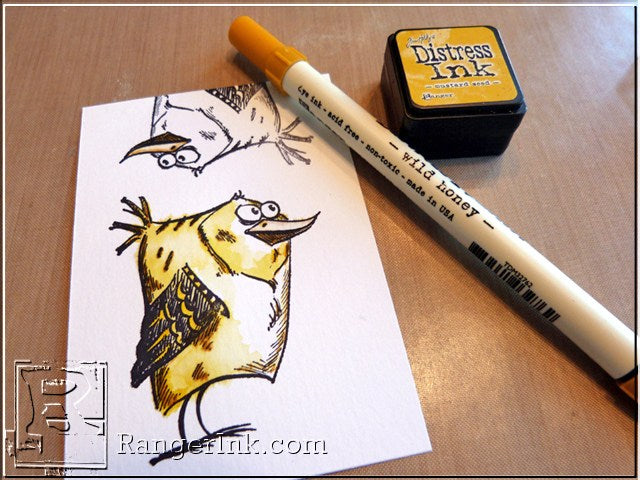 To watercolor the bird, smoosh Mustard Seed Distress ink onto your craft sheet and pick up the ink using a very wet watercolor paintbrush. Add the yellow ink to the head, wing, and back of the main bird image. Dry the image with a heat tool. Go over the shaded areas of the image with a slightly darker color of Distress Marker, in this case Wild Honey, and blend the inks with the wet paintbrush. Color the beak of the partial image with the Wild Honey marker, and blend with the wet paintbrush.
 Add a bit of Black Soot Distress Ink to the craft sheet, and apply a very slight shade of ink the bird’s belly on the main image, and the eyes of the partial image, using the wet paintbrush. Dry the images with the heat tool.
 Die cut the bird and the partial facial features using the matching Thinlits dies.
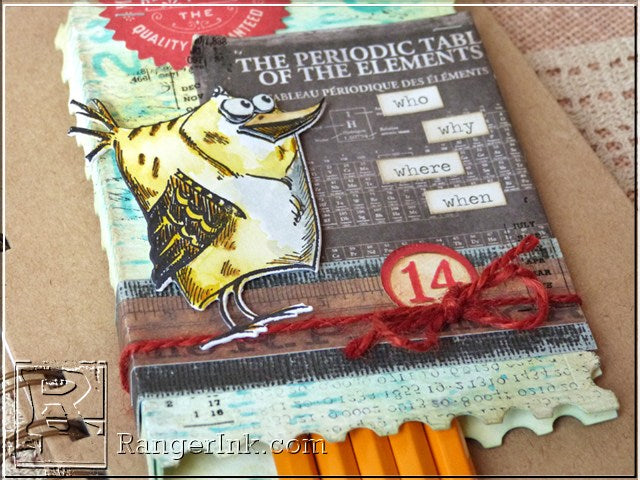 Adhere the bird to the front cover using foam adhesive between the layers for a bit of dimension. And finally, apply a coat of Glossy Accents to the eyes and beak.


