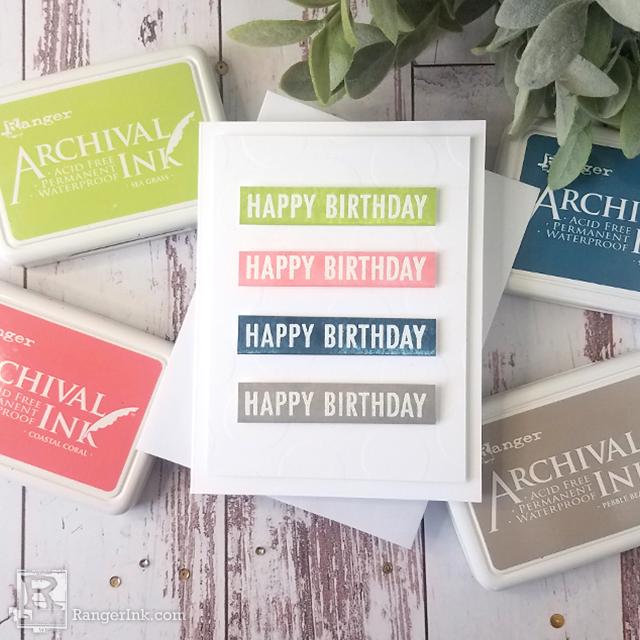
Not much time, but still want to make an amazingly adorable birthday card? Grab the newest colors from in the Archival Ink™ line, Simon Hurley create. Stamps, and Embossing Powder and follow along with this tutorial from Joy Baldwin.

Archival Ink™ Happy Birthday Card by Joy Baldwin
- Materials
- Instructions
Instructions

Short on time to make a birthday card? Problem solved. Today I am sharing a simple project with a clean and modern look that is perfect to give to anyone.

Step 1: For the background of this card, use the Polka Dotty Stencil to dry emboss on a piece of Perfect White Cardstock. Run it through a die cut machine with the foam pad. Trim piece down to 4”x5 1/4.

Step 2: Here is an up close view of the dry embossed background.

Step 3: Take the Pebble Beach, Seafarer, Coastal Coral and Sea Grass Inks and rub the ink pad directly onto a piece of Perfect White Cardstock. Do this until the desired look is achieved.

Step 4: Now stamp the “Happy Birthday” sentiment from Bestest Friends Stamp set on each color (make sure the Archival Ink is dry before stamping), using the Grey Tinted Embossing Ink and White Embossing Powder. Heat that until it is melted. Trim each piece down.

Step 5: Now add the White Adhesive Foam behind the dry embossed panel and inked sentiment strips.

Step 6: To finish the card, Center the dry embossed panel on an A2 Size white card base (made one from Stark White Cardstock), Then center the “Happy Birthday” sentiments on the card.

 Hi my name is Joy Baldwin, AKA, Create it with Joy. I am a wife and a mother to 3 kids and 3 crazy animals. I homeschool my 2 youngest kids (maybe I'm crazy) and am a part-time Nail Tech. I absolutely LOVE the creative process of making cards and the tutorials that go along with them. Also, the community of wonderful crafters and the friendships that follow. Find me at www.createitwithjoy.com.
Your Cart
- Choosing a selection results in a full page refresh.


