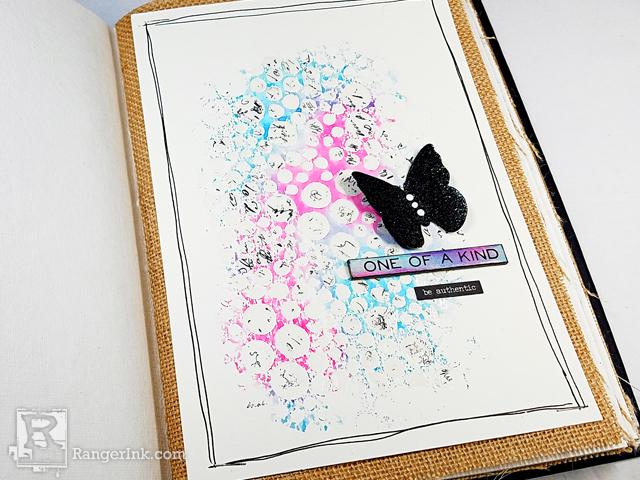
Hey there, Amber here, from Bella Rose Creative! I’m so excited to be here and to share with you one of my favorite techniques. This is a great technique because it can be used for cards, layouts or art journal pages.

3 in 1 Stencil Technique by Amber Kroening
- Materials
- Instructions
- Ranger Watercolor Paper
- Dina Wakley Media Journals
- Tim Holtz Mini Distress® Ink Pads: Broken China, Picked Raspberry, Black Soot
- Dylusions Stencils: Bubbles
- Ranger Mini Misters
- Ranger Texture Paste: Transparent Gloss
- Fude Ball Pen: Black
- Ranger Emboss It™ Ink Pad Clear
- Ranger Embossing Powders: Black Sparkle
- Archival Ink™ #0 Pads: Jet Black
- Ranger Enamel Accents: Glacier White
- Ranger Heat it™ Craft Tool
- Tim Holtz by Stamper’s Anonymous Ledger Script Stamp
- Tim Holtz idea-ology: Small Talk Stickers; Quote Chips
- Palette Knife
- Diecut Butterfly
Instructions

Step 1: Choose a stencil, a stamp, a texture paste and two distress ink colors. I chose the Dylusions Bubbles stencil, Tim Holtz’s Ledger stamp, Glossy Texture Paste, and Broken China & Picked Raspberry Distress Inks.

Step 2: On top of a piece of scrap paper apply Distress Inks directly to your stencil, and then spritz the stencil with your Mini Mister

Step 3: Remove your scrap paper, and press your watercolor paper onto the stencil. Carefully remove the watercolor paper from the stencil. You’ll be left with this super yummy watercolor-ish stencil pattern.

Step 4: In this step, we will use the stencil as both a mask and a stencil at the same time. Line your clean, dry stencil up with your Distress Ink pattern. I used a clip to secure it in place. Now, stamp directly over the stencil. This works better without an acrylic block because you can more easily push the stamp into the open areas of the stencil.

Step 5: Remove your stencil, and give your paper a quick dry with the heat gun to make sure the ink is set.

Step 6: Using the stencil as a mask, line it up just like before, and apply texture paste over the stencil with a palette knife.

Step 7: Remove the stencil and allow texture paste to dry.

Step 8: Draw a sketchy border with a black pen. I used a Fude Ball pen. Color your quote chip with the same Distress Inks we used earlier by rubbing it directly onto the quote chip. Adhere onto your project, along with a sticker from the Small Talk sticker pack.

Step 9: Smoosh die-cut butterfly into the Ranger Emboss it pad, apply embossing powder, and heat with heat gun to melt. Adhere to project. Use white Enamel Accents to add three dots to the center of the butterfly.

Step 10: Staple page into Dina Wakley Media Journal. I stapled mine onto one of the burlap pages.

Your Cart
- Choosing a selection results in a full page refresh.


