


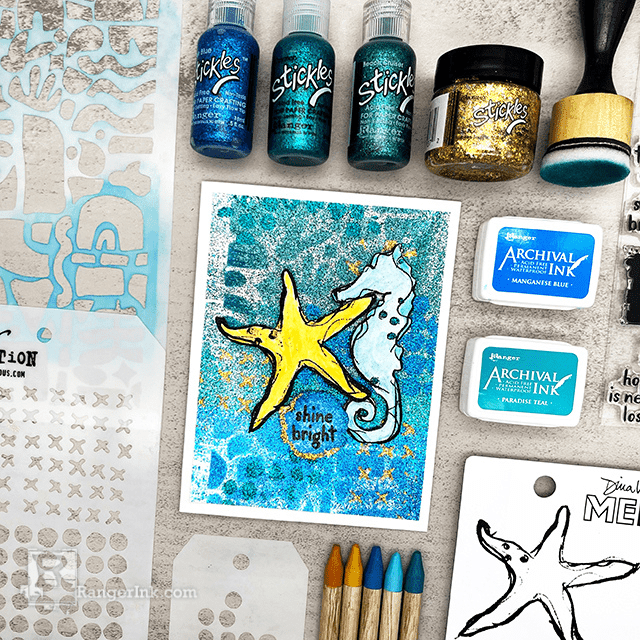
You can never have too much sparkle! In this tutorial, Miriam Prantner show us how to layer with Stickles, Archival Ink, and stencils to create a bright and impactful background.
Stickles & Archival Ink Shine Bright Card by Miriam Prantner
- Materials
- Instructions
Stickles Glitter Glue True Blue
Stickles Glitter Glue Beach Cruiser
Stickles Glitter Gel Solar Flare
Dina Wakley Media stamp Scribbly Reef Creatures
Tim Holtz Stampers Anonymous Layering Stencil Cutout Shapes 2
Tim Holtz Stampers Anonymous Stamp & Stencil Mixed Media Silhouette Birds
Tim Holtz Stampers Anonymous Stamp & Stencil Mixed Media Note Quotes
Tim Holtz Stampers Anonymous Element Stencil Everyday Art
Simon Hurley create. Paste Tool Set
Archival Ink Pad Paradise Teal
Archival Ink Pad Manganese Blue
Wendy Vecchi Perfect Cardstock White Panels
Wendy Vecchi Perfect Cardstock White Cards
Other:
Masking Tape
Instructions
Today’s project is all about sparkle. Stickles aren’t just for accents. Use them in layers and add some inking to create rich background with great depth.


Step 1: Squeeze True Blue, Cayman, and Beach Cruiser Stickles Glitter Glue along edge of Wendy Vecchi Perfect Cardstock White Panel. Use Simon Hurley Paste Scraper to spread across panel. Do not sorry if this layer is not perfectly even, this simply provides a base for the remainder of the design. Allow Stickles to dry.


Step 2: Place Tim Holtz Stampers Anonymous Layering Stencil Cutout Shapes 2 over panel and use Ranger Ink Blending Tool to add Ranger Archival Ink Manganese Blue at the top of the panel, and Ranger Archival Ink Paradise Teal to the bottom.


Step 3: Place small circles stencil from Tim Holtz Stampers Anonymous Element Stencil Everyday Art set over panel and spread Stickles Glitter Glue True Blue through stencil with Simon Hurley Paste tool. Repeat at top and bottom of the panel using Stickles Glitter Glue Cayman, allow to dry. Repeat using X portion of stencil from Tim Holtz Stampers Anonymous Stamp & Stencil Mixed Media Silhouette Birds and Stickles Glitter Gel Solar Flare, allow to dry.


Step 4: Stamp starfish from Dina Wakley Media stamp Scribbly Reef Creatures set with Ranger Archival Ink Jet Black, emboss with Ranger Black Embossing Powder.

Step 5: Color starfish using Fossilized Amber and Wild Honey Distress Watercolor Pencils and using Ranger Artist Brush and a small amount of water, soften and smooth coloring. Repeat Steps 4 and 5 with Seahorse image and Tumbled Glass, Mermaid Lagoon, and Peacock Feathers Distress Watercolor Pencils. Cut out Starfish and Seahorse images

Step 6: Assemble card. Run panel through die cutting machine to flatten, trim down and adhere to Wendy Vecchi Perfect Cardstock White Card. Stamp solid circle from Tim Holtz Stampers Anonymous Stamp & Stencil Mixed Media Note Quotes with Ranger Archival Ink Manganese Blue, add sentiment from same set with Ranger Archival Ink Jet Black. Clear emboss and fussy cut. Adhere sentiment and Scribbly images with foam adhesive. Add Stickles accents to these elements using Stickles Glitter Glue True Blue, Stickles Glitter Glue Cayman, and Stickles Glitter Gel Solar Flare. Allow to dry.
 My name is Miriam Prantner, and I live in Arlington, Virginia with my husband, two daughters, and lemon beagle. I am a lifelong crafter of all genres, although these days I focus mostly on crochet and paper crafting. In addition to making pretty things, I design products (stamps/stencils/dies) for Simon Says Stamp, and also taught a class for Craftsy, Fresh Eyes on your Cardmaking Supplies. To see more of my work, check out my blog: mprantner.blogspot.com, and follow me on instagram @mprantner.
Related Posts
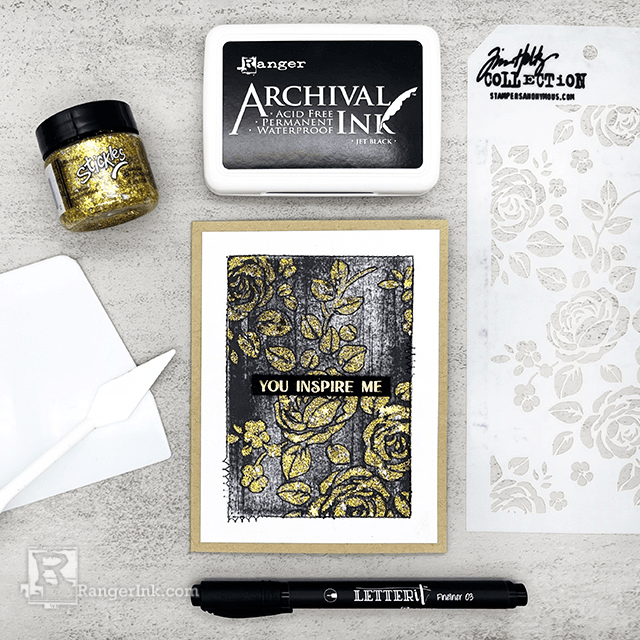
Product Play: Archival Inks, Stickles, and Doodling with Miriam Prantner
Add eye-catching texture and shimmer to your cards like Miriam Prantner did with this stunning floral design! In this tutorial,...
Read More