


Ranger's Perfect Pearls shimmer and shine like the ocean on a summer's day. Follow along as Lauren Bergold uses them to create pearlescent stamped images with Perfect Medium; then mixes the powders with water for a dazzling emboss/resist effect.
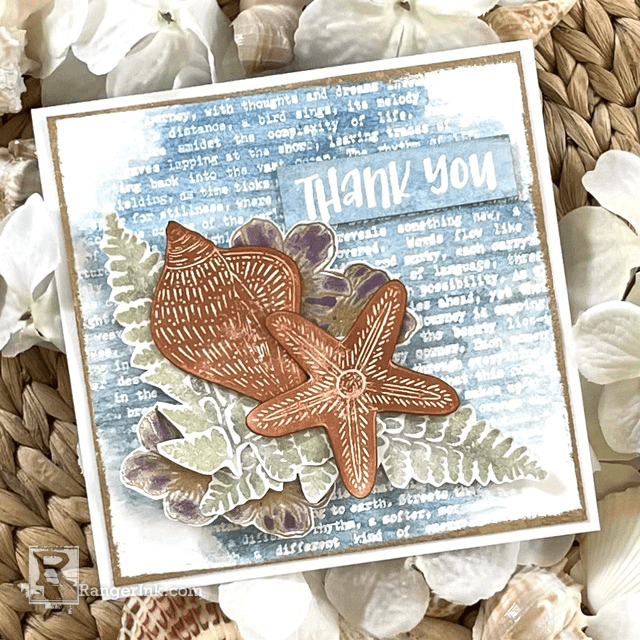
Perfect Pearls Beachscape Card by Lauren Bergold
- Materials
- Instructions
Perfect Pearls™ Pigment Kit Metallics
Perfect Pearls™ Pigment Powders: Blue Patina, Forever Green, Grape Fizz, Forever Blue
Simon Hurley create. Photopolymer Stamp Smooth Sailing
Simon Hurley create. Spellbinders Smooth Sailing Die
Simon Hurley create. Cling Stamp Leaf Prints
Simon Hurley create. Spellbinders Leaf Prints Die
Simon Hurley create. Photopolymer Stamp Beautiful Blooms
Simon Hurley create. Cling Rubber Background Stamp Typewriter
Instructions
Perfect Pearls are, in my opinion, one of Ranger's most flexible products, since there are so many cool ways to use them! I highly recommend the Perfect Pearls Kits, which contain everything you need to get started: several coordinating shades, a small pad of Perfect Medium and two brushes.

Step 1: Stamp the seashell and starfish from Simon Hurley's Smooth Sailing Stamp Set in Perfect Medium on a small piece of Stark White Cardstock. Apply a generous amount of Perfect Bronze Perfect Pearls to each image and use a detail brush to distribute the pigment powder. Tap off the excess and return to the jar. Use the dusting brush to clean off the image, then lightly spritz with water to set the pigment. Gently blot the image and set aside to dry completely.

Step 2: When the shells have dried completely, cut out with scissors or the coordinating dies. Ink around the edges with Sepia Archival Ink, if desired.

Step 3: Stamp the fern cluster from Simon's Leaf Prints Stamp Set in Perfect Medium twice on a piece of Stark White Cardstock. Apply a small amount of Blue Patina Perfect Pearls to the spines of the ferns and a generous amount of Forever Green to the rest of the image. Use the detail brush to distribute and blend the pigment powders. Tap off the excess and discard. Use the dusting brush to clean off the image, then lightly spritz with water to set the pigment. Gently blot the image and set aside to dry completely. When dry, cut out neatly with scissors or the coordinating dies.

Step 4: Stamp the primroses from Simon's Beautiful Blooms Stamp Set twice in Emboss It Clear Embossing Ink and sprinkle with Ranger Gold Embossing Powder. Tap off the excess and return to jar. Melt the powder with the Heat It Tool. Allow images to cool completely before proceeding.

Step 5: Mix a small amount of Grape Fizz Perfect Pearls with a few drops of water and paint just the flowers (the stems will be discarded) with a nice dark coat. Set aside and allow to dry completely before cutting out just the flowers. (No need to "set" the Pearls when using them wet!)

Step 6: Trim a piece of Stark White Cardstock to 5.25" square. Using Emboss It Clear Ink, ink just the center of Simon's Typewriter stamp, leaving the corners bare. If desired, use a small Angled Brush to remove a little more powder around the edges, for a softly distressed look. Melt with the Heat It Tool and allow image to cool completely before proceeding.

Step 7: On a scrap of Stark White Cardstock, using clear Emboss It ink, stamp "thank you" from the Letter It Thank You Stamp Set and emboss with Ranger White Embossing Powder.

Step 8: Mix a small amount of Blue Patina Perfect Pearls with a few drops of water and paint a wash of color over just the embossed portion of the panel from Step 6. Lightly blot off excess moisture if necessary; then repeat using a wash of Forever Blue. Set aside and allow to dry completely. Use the leftover diluted pigments to paint the "thank you" sentiment from Step 7.

Step 9: Run the clear Emboss It Ink Pad lightly around all four edges of the embossed panel from Step 6. Dip the inked edges into Ranger Gold Embossing Powder and melt with the Heat It tool.

Step 10: Assembly: Gently curl the edges of the fern fronds and adhere just the centers with small pieces of foam tape at the lower lefthand corner of the embossed text panel. Add the shells atop the fronds using Dina Wakley MEdia Glue. Tuck the purple flowers under the fronds as pictured and adhere. Add the sentiment above the cluster of stamped images. Adhere the completed design panel to a 5.5" square card.

Step 11: Sign the card, grab an envelope and mail it to someone you appreciate... it will make their day!
 My name is Lauren Bergold, and I live in central New Jersey with my husband of 30+ years and A LOT of art supplies! My favorite medium is paper, and I especially love making cards. I teach papercrafting classes, as well as collecting and compiling vintage and found papers. You can find me on my blog, All the Good Blog Names Were Taken, and on Instagram as @llaurenb where I love to connect with other artists and makers!
Related Posts
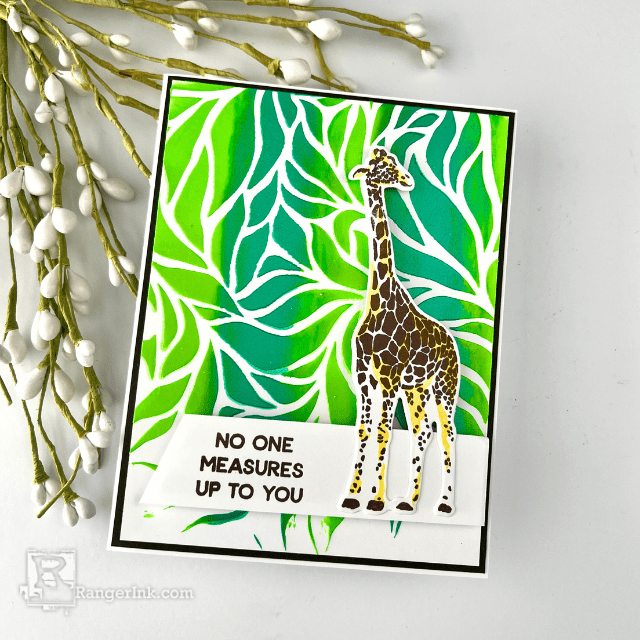
Simon Hurley create. Neon Lunar Paste Wild Card by Cassie Trask
Go wild with your creativity! Cassie Trask used the newest Simon Hurley create. Wild About You Stamp, Lush...
Read More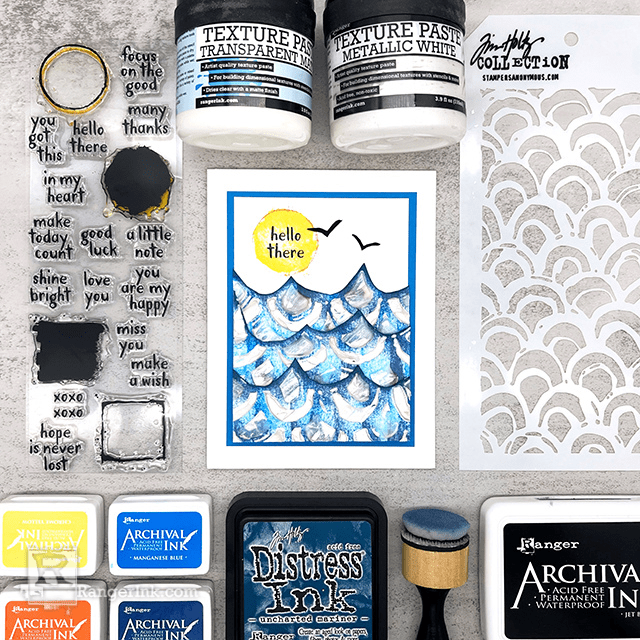
Ranger Texture Paste Hello Card by Miriam Prantner
Add dimension and shine to your handmade cards like Miriam Prantner. She used Ranger Metallic White and Transparent Matte...
Read More