


Follow along as Lauren Bergold creates a bold and beautiful encouragement card that’s bursting with color and positivity. She uses the Simon Hurley create. Zesty stamp set along with the coordinating Lemon Branch Layering Stencil Set to bring her design to life. With Ranger Opaque Matte Texture Paste and Archival Reinkers, she adds realistic, eye-catching dimension that makes this card truly pop.
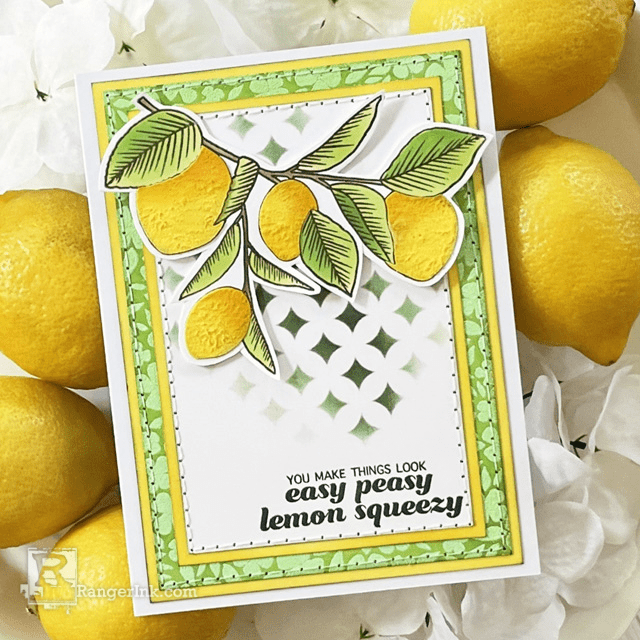
Opaque Matte Texture Paste Lemon Card by Lauren Bergold
- Materials
- Instructions
Instructions
I love the way Simon's Zesty Stamp Set and Lemon Branch layering stencils work beautifully together. As a matter of fact, they also each work brilliantly on their own, too. Because you can never have too many cardmaking options!

Step 1: On a small piece of Stark White Cardstock, stamp the lemon branch from Simon Hurley's create Zesty Clear Stamp Set in Coffee Archival Ink.

Step 2: Use the coordinating Lemon Branch Layering Stencils to add color as follows: a light application of Coffee for the stem; Sea Grass for the large leaf segments; Vivid Chartreuse for the leaf accents; OPTIONAL: Sun Dazed on the lemons. (Note: this "basecoat" of yellow on the lemons is optional; the tinted texture paste in the next step will add both color and coverage, but this extra color feels "richer" and will fill in any little flaws in the texture paste layer.)

Step 3: On a disposable palette or your craft sheet, mix 3 drops of Sun Dazed Reinker into about a half tablespoon of Ranger Opaque Matte Texture Paste and mix thoroughly with the palette knife from Simon's Paste Tools set. With the lemon stencil still in place on the lemon branch, apply an even layer of the tinted Texture Paste.

Step 4: With the lemon stencil still in place on the lemon branch, lightly tap a fingertip into the paste, all over all of the lemons. Touch firmly enough to leave a little bit of uneven, lemon-peel-ish texture on the lemons, but not so firmly as to make dents in the paste. If a dent or hole appears, use the palette knife to re-smooth, then lightly tap the surface once more.

Step 5: Lift off the stencil carefully and immediately rinse it with warm tap water; if necessary, a little bit of mild dish soap can be used to remove any dried bits of paste. Set aside and allow the paste to dry completely. When dry, if desired, use a Mini Ink Blending Tool and a Domed Foam to add a little more Sun Dazed ink to the tops of the lemons as shading. Use scissors to neatly cut out the branch, leaving a narrow border of white all around the image.

Step 6: Trim a piece of Stark White Cardstock to 3.5 x 5" and stamp the "Easy Peasy" sentiment from the Zesty set at the bottom right-hand corner in Olive Archival Ink.

Step 7: Over the same panel from Step 6, center the diamond layer stencil from Simon's Geo Circles Layering Stencils and apply Olive Archival in a rough diamond shape at the center of the panel, letting the intensity of color trail off at the sides, at the top, and above the stamped sentiment. Ink just the edges of the panel with a little more Olive Archival, if desired.

Step 8: On a 4.25 x 5.75" panel of Stark White Cardstock, stamp Simon's Bitty Botanical background in clear Emboss It Ink and sprinkle with Ranger Neon Green Embossing Powder. Tap off the excess powder and return to the jar. Melt powder with the Heat It Craft Tool. Allow to cool completely before proceeding.

Step 9: Apply a nice dark coat of Sea Grass Archival around the edges of the panel from Step 8. Use a tissue or alcohol wipe to remove any excess ink from the embossed image. Lightly ink the edges with Olive Archival, if desired.

Step 10: Trim two pieces of Stark White Cardstock to 3.5 x 5.25" and 4.25 x 6" respectively, and apply a nice dark coat of Sun Dazed Archival around the edges of each panel. Add a tiny bit of Olive to the very edges of the panels, if desired.

Step 11: Assembly: Add the lemon branch to the stenciled/sentiment panel from Steps 6 and 7 using small pieces of foam tape. Mat on the smaller Sun Dazed panel, then on the Bitty Botanicals panel, then on the larger Sun Dazed mat. Add the completed design panel to a white A6 (4.5 x 6.25") card. Optional: Add some machine stitching or faux stitching around the perimeter, if desired.

Step 12: Use the coordinating stamps from the Zesty set to add an interior sentiment, sign the card, address the envelope, and send to a friend or family member ASAP... it will make their day!
 My name is Lauren Bergold, and I live in central New Jersey with my husband of 30+ years and A LOT of art supplies! My favorite medium is paper, and I especially love making cards. I teach papercrafting classes, as well as collecting and compiling vintage and found papers. You can find me on my blog, All the Good Blog Names Were Taken, and on Instagram as @llaurenb where I love to connect with other artists and makers!
Related Posts
Simon Hurley create. Neon Lunar Paste Wild Card by Cassie Trask
Go wild with your creativity! Cassie Trask used the newest Simon Hurley create. Wild About You Stamp, Lush...
Read More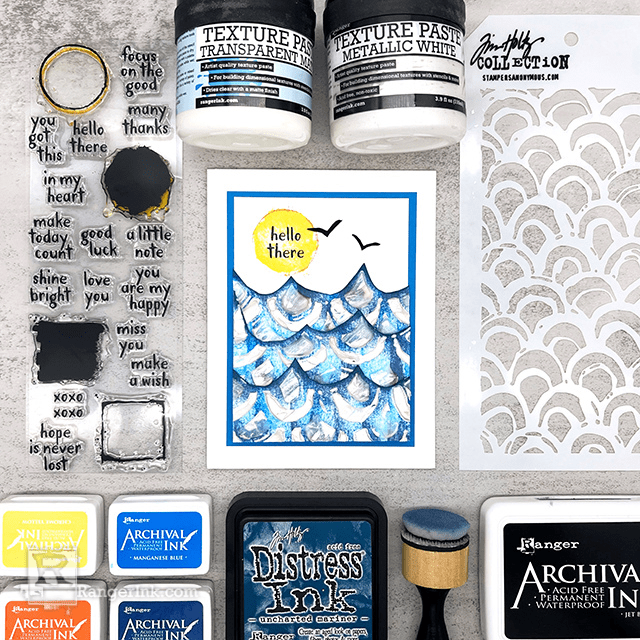
Ranger Texture Paste Hello Card by Miriam Prantner
Add dimension and shine to your handmade cards like Miriam Prantner. She used Ranger Metallic White and Transparent Matte...
Read More