


Channel your inner artist with today's tutorial, where Miriam Prantner shares a simple technique for painting with Liquid Pearls to create unique backgrounds with big impact. These quick cards are also easily mass producible, allowing you to make a bunch of cards in a hurry.

Mark Making with Liquid Pearls by Miriam Prantner
- Materials
- Instructions
Instructions
Hi friends, today I’m sharing how to create simple and impactful card backgrounds using Liquid Pearls for mark making.

Step 1: Cut Distress Black Heavystock into 4 1/4” x 5 1/2” panels and assemble supplies: selected Liquid Pearls colors, Ranger Artist Brush(es), and water.

Step 2: Squeeze out some of your first color onto your craft mat and dilute a little with water.

Step 3: Randomly paint vertical marks onto heavystock panels.


Step 4: Repeat with additional colors. There is no need for marks to be uniform, variation just adds to the effect.


Step 5: For a fuller pattern, repeat steps 3-4. Using a thinner brush adds another level of texture. Feel free to paint over/overlap your marks as Liquid Pearls dry very quickly.

Step 6: Use Anti-Static Pouch to treat black heavystock and then ink/emboss sentiment using Clear/Emboss It Pad and Silver Embossing Powder. Fussy Cut sentiment.


Step 7: Assemble cards: trim down painted panels and adhere to Make Art Perfect Cardstock Landscape Cards. Adhere sentiments with foam adhesive.
 My name is Miriam Prantner, and I live in Arlington, Virginia with my husband, two daughters, and lemon beagle. I am a lifelong crafter of all genres, although these days I focus mostly on crochet and paper crafting. In addition to making pretty things, I design products (stamps/stencils/dies) for Simon Says Stamp, and also taught a class for Craftsy, Fresh Eyes on your Cardmaking Supplies. To see more of my work, check out my blog: mprantner.blogspot.com, and follow me on instagram @mprantner.
Related Posts
Simon Hurley create. Neon Lunar Paste Wild Card by Cassie Trask
Go wild with your creativity! Cassie Trask used the newest Simon Hurley create. Wild About You Stamp, Lush...
Read More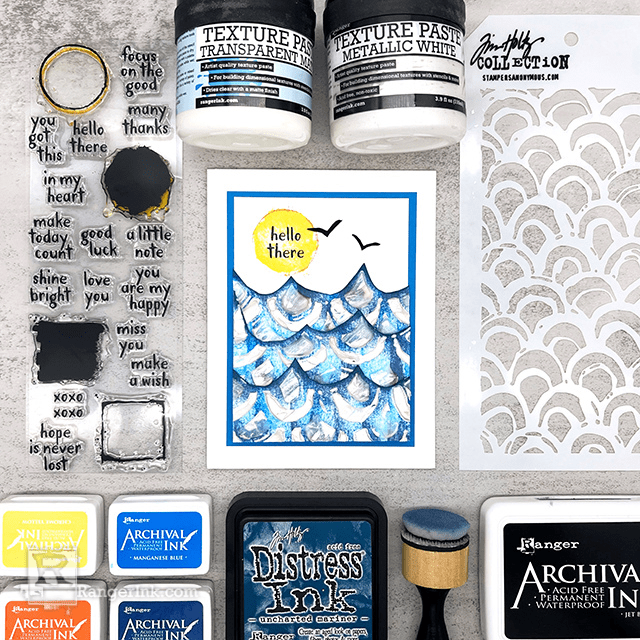
Ranger Texture Paste Hello Card by Miriam Prantner
Add dimension and shine to your handmade cards like Miriam Prantner. She used Ranger Metallic White and Transparent Matte...
Read More