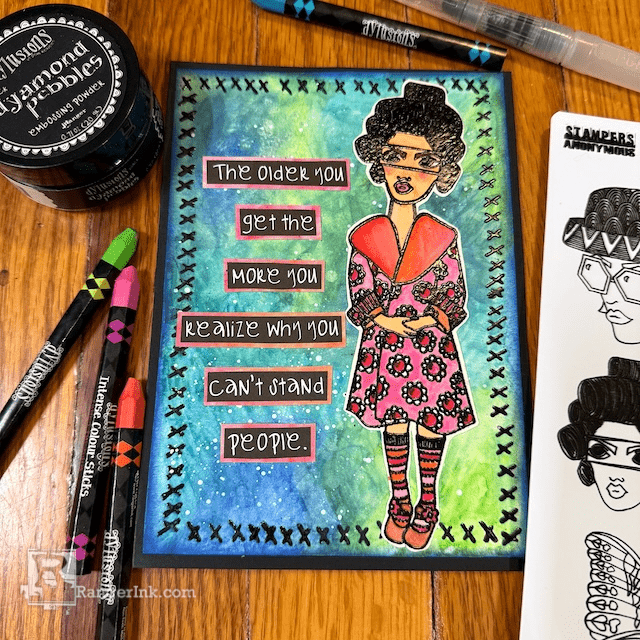
Bring a pop of personality to your next birthday card! Jess Peters used the latest Dylusions Stampers Anonymous Dinky Dolls stamps, Intense Colour Caykes & Sticks, and more, to create this bold and snarky handmade card. It’s sure to bring a smile or laugh to someone’s special day!

Dylusions Dinky Dolls Birthday Card by Jess Peters
- Materials
- Instructions
Dylusions Journal The Classics
Dylusions Intense Colour Caykes & Sticks Set #1
Dylusions Stamper’s Anonymous Cling Mount Stamp Dinky Dolls Set #1
Dylusions Stamper’s Anonymous Cling Mount Stamp Dinky Dolls Set #3
Dylusions Bigger Back Chat Black Set #4
Dylusions Dyamond Pebbles - Black
Dylusions FlipCap Paint - White Linen
Dylusions Mini Archival Ink Kit #6
Tim Holtz Distress Tiny Blending Tool 2pk
Hi there, friends! I was so excited to see the new Dinky Dolls stamp collection from Dylusions because they are the perfect size for creating a handmade birthday card. The bright colors of the caykes and sticks bring the stamps to life and the snarky quote is sure to make the recipient smile. Have fun creating!


Step 1: Tear out a sheet of mixed media paper from the Dylusions Classics journal. From the Dylusions Stamper’s Anonymous Dinky Dolls Set #1, stamp a body and head image onto your page using the Dyamond Medium Pad. Cover the stamped images with Black Dyamond Pebbles, tap off excess, and use the Ranger Heat-It Craft Tool to emboss.


Step 2: Brush the Dylusions Intense Colour Caykes with a waterbrush and use it to color in your embossed images. Add a neck to the girl’s head using the caykes and a black pen.


Step 3: Tear out another page from your journal and trim it down to 4¾” x 6½”. Repeat the process from Step 1 to create a border around your panel using the “X” border stamp from the Dylusions Stamper’s Anonymous Dinky Dolls Set #3.


Step 4: With the Intense Colour Sticks, scribble patches of color onto your panel using blues and greens. Blend out your scribbles with the Dylusions waterbrush and allow to dry.


Step 5: Sprinkle water onto the panel and allow it to sit for a minute or two. Blot with a paper towel to give some texture to the background.


Step 6: Add details to the background by splattering FlipCap Paint in White Linen onto your panel and ink the edges using Dylusions Mini Archival Ink in Just Indigo with a tiny blending tool.


Step 7: On a scrap piece of mixed media paper repeat the process from Step 4 using the Pink, Red, and Orange color sticks and allow to dry.

Step 8: From the Dylusions Bigger Back Chat Black Set #4, find the quote that reads “The older you get the more you realize why you can’t stand people”. Cut the quote and stick it to your pink/orange paper.

Step 9: Cut out your quote, head, and body while making sure to leave a small border around each element.

Step 10: Using Dylusions Glue, attach all of your pieces onto the blue/green panel.

Step 11: Tear a black page out of your Classics journal and trim it down to 7” x 10”. Fold the sheet in half and glue your completed panel to the front of your card to complete!


 Hello friends! My name is Jess and I live in New Jersey where I was born and raised. I discovered the world of art journaling and mixed media in 2022 and I’ve been obsessed ever since! I love bright bold color and I’m a sucker for all things that glitter and shine. I’m also inspired by music and song lyrics and often include them in my layouts. If you’d like to check out more of my art and process pics you can find me on Instagram