


by Richele Christensen

DIY Christmas Cards by Richele Christensen
- Materials
- Instructions
- Tim Holtz® Alcohol Inks : Lake Mist
- Tim Holtz® Waterbrush : Detailer Tool
- Tim Holtz® Distress Mixed Media Archival Ink Palette
- Tim Holtz Distress Oxide Ink Pads : Antique Linen, Iced Spruce, Frayed Burlap, Broken China, Salty Ocean, Abandoned Coral, Candied Apple, Fired Brick, Luck Clover, Peacock Feather, Peeled Paint, Twisted Citron
- Tim Holtz® DIY – Distress It Yourself Ink Pad
- Tim Holtz® Distress Collage Mediums
- Ranger Brayers
- Ranger Craft Scraper
- Ranger Mini Blending Tool with Foam
- Ranger Adhesive Foam Rolls
- Ranger Surfaces Watercolor Paper
- Ranger Non-Stick Craft Sheet™
- Ranger Heat it™ Craft Tool
- Tim Holtz Idea-ology: Adornment – Snowflakes, Jingle Brads, Mirrored Stars, Trimmings – Metallic, Paper Stash - Classic Kraft
- Tim Holtz by Stampers Anonymous Stamp Sets: CMS312 Flurry and Pine (background); CMS313 Carved Christmas 1; CMS314 Carved Christmas 2; CMS320 Mini Swirly Snowflakes; CMS321 Great Outdoors (words); CMS324 Sparkles and Christmas (background)
Instructions

Step 1: Create a custom DIY pad with three colors. Apply a generous amount of ink to the DIY pad. Rub Craft Scrapper over the ink to work into the pad.

Step 2: Roll the Brayer over the inked pad to collect the ink, apply the ink to the DIY lid to make a color index.

Step 3: Create a few DIY custom pads with your favorite color combinations.
REDS – Abandon Coral, Candied Apple, Fired Brick
GREENS – Lucky Clover, Peeled Paint, Twisted Citron
BLUE/GREEN – Lucky Clover, Peacock Feathers, Salty Ocean

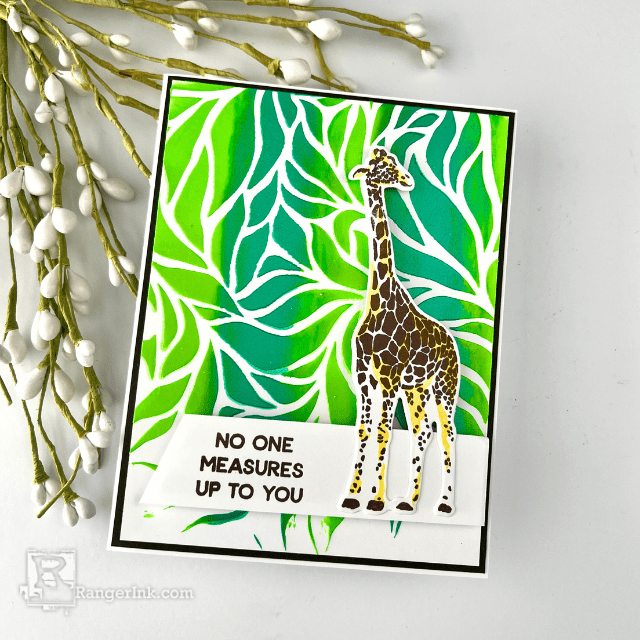
Step 4: Stamp Carved Christmas image (Mitten, Ornament, Tree, etc.) onto Watercolor Cardstock.

Step 5: Create a mask by stamping the image on a Post-It, cut out a little smaller then image and place over stamped image for masking.

Step 6: Stamp Sparkles image over the background with Distress Oxide Ink.

Step 7: Apply Distress Oxide Ink to Craft Sheet, pick up ink with Detail Waterbrush and add watercolor to background if desired.

Step 8: Stamp message on a strip of watercolor cardstock with Archival Ink.

Step 9: Sand and Ink the edges with Frayed Burlap Distress Oxide Ink on a Mini Ink Blending Tool.

Step 10: Add a colored mat to background and message and adhere layers to base Kraft Card. Adhered message to card with foam tape.

Step 11: Tie Metallic Trimmings ribbon around card with a bow.

Step 12: Add embellishments as desired with Distress Collage Medium.


Related Posts
Simon Hurley create. Neon Lunar Paste Wild Card by Cassie Trask
Go wild with your creativity! Cassie Trask used the newest Simon Hurley create. Wild About You Stamp, Lush...
Read More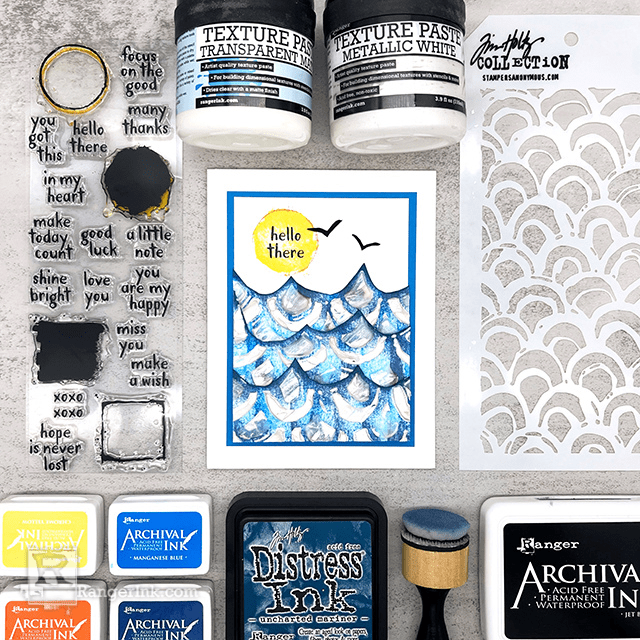
Ranger Texture Paste Hello Card by Miriam Prantner
Add dimension and shine to your handmade cards like Miriam Prantner. She used Ranger Metallic White and Transparent Matte...
Read More